Beginner’s Guide to Astrophotography: How to Capture Stunning Photos of the Night Sky
Learn how to capture breathtaking photos of stars, planets, and galaxies with this complete beginner’s guide to astrophotography. Discover the best equipment, settings, techniques, and editing tips to master night sky photography like a pro.
LIFESTYLEHOBBYPHOTOGRAPHYFEATURED
8/13/20258 min read
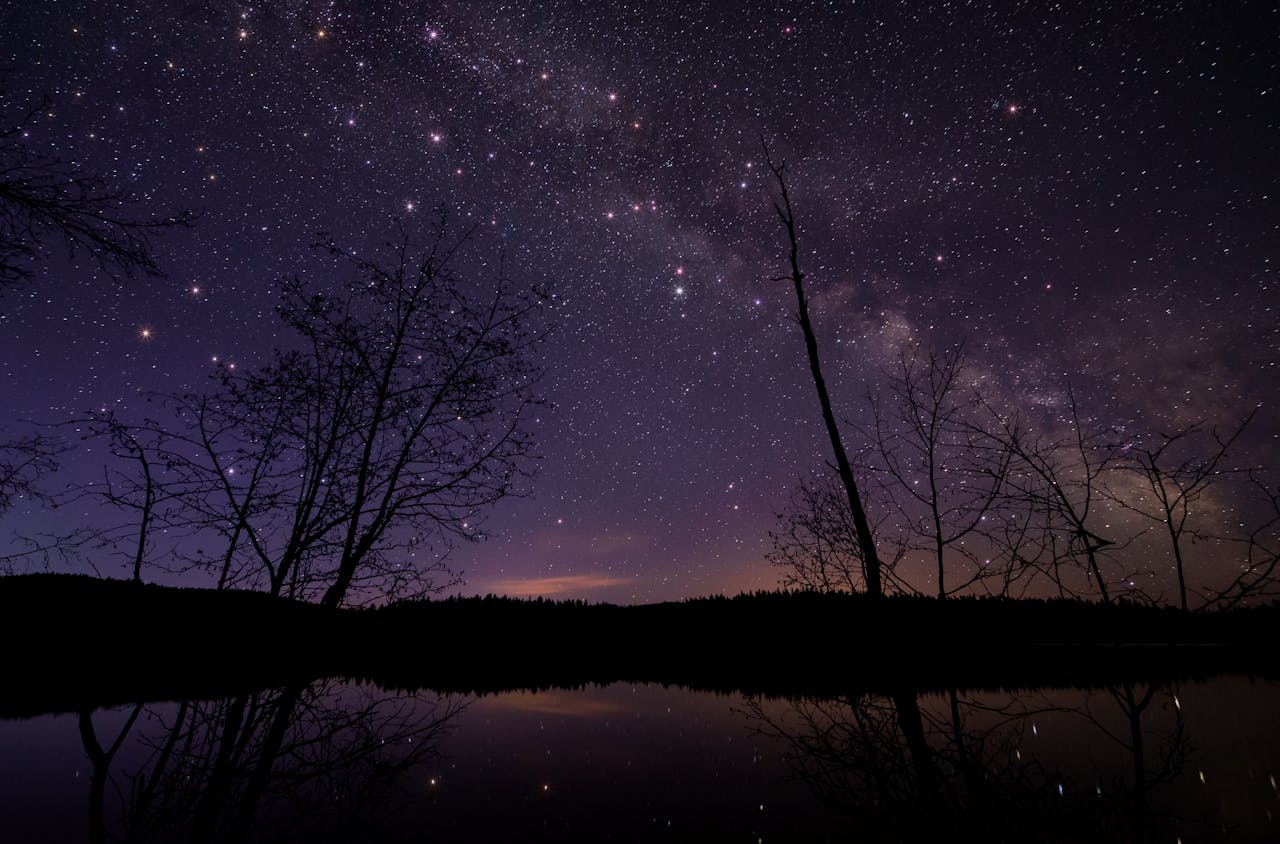
There’s something profoundly magical about looking up at a sky full of stars—the glimmering constellations, the faint glow of the Milky Way, and the occasional streak of a shooting star. For centuries, humans have been captivated by the night sky, using it for navigation, storytelling, and scientific discovery. But today, thanks to modern technology, we can do more than just gaze at the stars—we can photograph them in stunning detail.
Astrophotography combines the art of photography with the science of astronomy. It’s about capturing the beauty of celestial objects and cosmic phenomena that are invisible to the naked eye. Whether you dream of photographing the Milky Way, the moon, or deep-sky galaxies, this guide will walk you through everything you need to know to start your journey into astrophotography—from gear selection and camera settings to post-processing and tips for perfect timing.
Let’s dive into the universe of night sky photography, step by step.
1. What Is Astrophotography and Why It’s Worth Trying
Astrophotography is a specialized genre of photography that involves capturing images of celestial events, astronomical objects, and areas of the night sky. Unlike typical landscape or portrait photography, astrophotography deals with extremely low light conditions, long exposure times, and often requires specialized gear or techniques.
Why You Should Try Astrophotography
A Connection with the Cosmos: Few forms of photography evoke as much awe and wonder as astrophotography. It connects you to the universe, offering a humbling perspective of our place in it.
Creative Expression: Every astrophotograph tells a story—of time, light, and perspective. It’s a chance to blend art and science.
Mindful Practice: Night sky photography teaches patience, planning, and focus. Waiting for the perfect alignment of stars can be as rewarding as the final image itself.
Educational Value: You’ll naturally learn about celestial mechanics, constellations, and even physics as you explore the night sky.
In essence, astrophotography isn’t just about images—it’s about the experience, the discovery, and the joy of capturing something larger than life.
2. Understanding the Different Types of Astrophotography
Before diving into the techniques and tools of astrophotography, it’s essential to understand the main types that define this fascinating art form. Each category comes with its own unique focus, equipment needs, and creative approach.
Wide-field astrophotography captures vast portions of the night sky using wide-angle lenses, making it ideal for photographing the Milky Way, constellations, and auroras.
Planetary astrophotography concentrates on close-up images of celestial bodies such as Jupiter, Saturn, and the Moon, often requiring telescopes or high-zoom lenses to reveal intricate surface details.
Deep-sky astrophotography takes things even further by targeting distant galaxies, nebulae, and star clusters, typically using telescopes and long exposures to uncover faint cosmic structures.
Time-lapse astrophotography tells the story of movement in the heavens by combining multiple frames over time, beautifully showcasing star trails or the graceful rotation of the Milky Way.
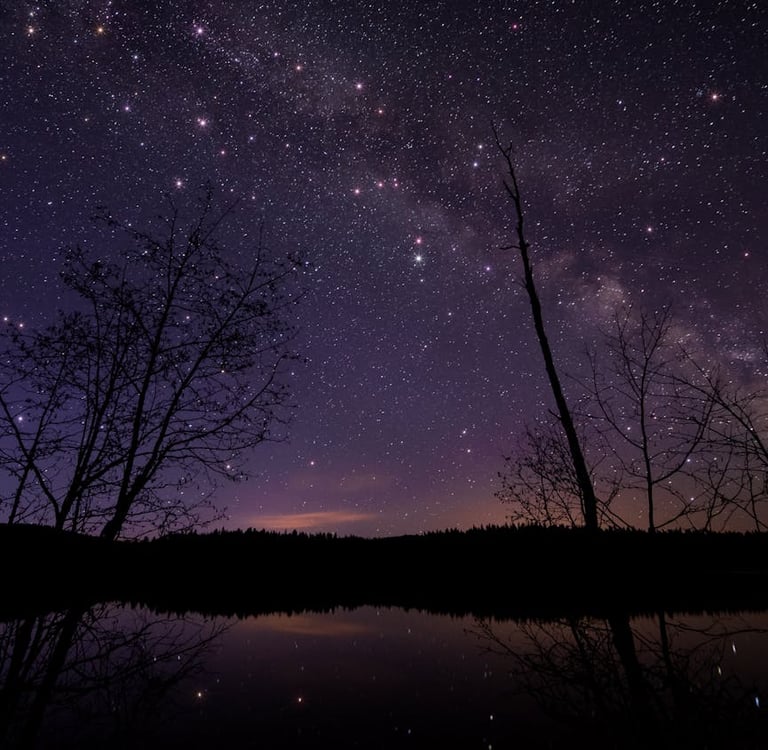
Lastly, nightscape photography merges earthly and celestial beauty, pairing landscapes like mountains, lakes, or city skylines with starlit skies for dramatic and immersive compositions. Each style offers its own rewards and challenges, but beginners often find wide-field and nightscape photography the most accessible, as they demand less specialized equipment and are more forgiving when it comes to tracking precision.
3. The Essential Gear for Astrophotography
You don’t need a space telescope to capture the stars, but the right gear makes all the difference between a grainy shot and a breathtaking celestial masterpiece. Let’s break down the essentials.
Camera
DSLR or Mirrorless Cameras are ideal because they allow manual control over shutter speed, ISO, and aperture.
Full-frame sensors are preferred for their better low-light performance, but APS-C sensors can also produce great results.
Recommended models: Canon EOS R, Nikon Z6, Sony A7 III, or Fujifilm X-T5.
Lens
Use a wide-angle lens (14mm–24mm) for Milky Way or nightscape photography.
For deep-sky images, you’ll need a telephoto lens or telescope attachment.
Choose a fast lens with an aperture of f/2.8 or lower to let in as much light as possible.
Tripod
A sturdy tripod is non-negotiable. Long exposures mean any camera shake can ruin your image. Carbon fiber tripods are lightweight and stable—ideal for travel.
Remote Shutter Release or Intervalometer
This prevents vibration from pressing the shutter button manually. An intervalometer is essential for time-lapse photography.
Star Tracker (Optional but Powerful)
A star tracker counteracts Earth’s rotation, allowing for longer exposures without star trails. Perfect for deep-sky or Milky Way photography.
Other Useful Accessories
Extra batteries: Long exposures drain power fast.
Headlamp with red light: Preserves night vision while adjusting settings.
Lens heater or dew shield: Prevents lens fog in humid or cold conditions.
4. Choosing the Right Location
Location is everything in astrophotography. The darker your sky, the better your photos.
Dark Sky Sites
Light pollution is the biggest enemy of stargazing. Use the Bortle Scale (ranging from 1 to 9) to measure sky darkness—1 being the darkest.
You can find dark-sky locations using tools like:
Dark Site Finder
Light Pollution Map
Clear Outside App
What to Look for in a Location
Minimal Light Pollution: Rural areas, deserts, or high-altitude locations work best.
Open Horizon: Avoid tall trees or buildings that block the sky.
Stable Weather: Clear, dry nights with minimal wind give sharper images.
Safety: Always scout during daylight to ensure a safe and accessible setup spot.
Some of the world’s most famous stargazing spots include Mauna Kea (Hawaii), Atacama Desert (Chile), and Namib Desert (Namibia)—but you can capture the stars beautifully even from your local countryside.
5. Mastering the Camera Settings for Astrophotography
Astrophotography relies on balancing three key settings: shutter speed, aperture, and ISO. Each plays a crucial role in controlling light and clarity.
1. Shutter Speed
Long exposures capture faint starlight, but too long an exposure causes star trails due to Earth’s rotation.
To find your ideal exposure, use the 500 Rule:
Shutter Speed (seconds) = 500 ÷ Focal Length (mm)
For example, with a 20mm lens on a full-frame camera:
500 ÷ 20 = 25 seconds.
This means you can shoot for about 25 seconds before stars start trailing.
2. Aperture
Use the widest aperture possible (f/1.8–f/2.8) to let in maximum light.
However, slightly stopping down (e.g., from f/1.8 to f/2.2) can reduce optical distortion and improve edge sharpness.
3. ISO
Start with an ISO between 1600–3200. Too low and your image will be dark; too high and you’ll get noise. Experiment to find your camera’s sweet spot.
4. Focus
Manual focus is mandatory. Autofocus rarely works in the dark.
Set focus to infinity.
Use live view and zoom in on a bright star to fine-tune.
Take test shots until stars look like pinpoints.
5. White Balance
Set your white balance to 3500–4000K to maintain a natural, cool night-sky tone.
6. File Format
Always shoot in RAW. It retains maximum data for post-processing adjustments.
6. The Art of Composition in Astrophotography
Even though you’re photographing stars, composition remains key to storytelling. Great astrophotography balances cosmic beauty with earthly context.
1. Use the Rule of Thirds
Position the Milky Way, moon, or constellations along intersecting gridlines for a balanced frame.
2. Include Foreground Elements
Foregrounds like mountains, trees, or lakes add depth and perspective. A reflection of the stars in water can create stunning symmetry.
3. Align Celestial Objects
Use apps like PhotoPills, Sky Guide, or Stellarium to plan where the Milky Way or moon will rise or set in your frame.
4. Embrace Leading Lines
Roads, rivers, or fences can lead the viewer’s eye toward the stars, making the image more immersive.
5. Experiment with Angles
Try shooting from ground level or capturing silhouettes against the starlight to enhance drama.
7. Planning Your Astrophotography Session
Preparation determines success in astrophotography. Here’s how to plan effectively:
1. Check the Moon Phase
The new moon offers the darkest skies, ideal for capturing the Milky Way. Avoid full moon nights unless you’re photographing the moon itself.
2. Use Astronomy Apps
PhotoPills – for Milky Way alignment and star positions.
Clear Outside – for cloud forecasts.
Stellarium – for celestial maps.
TPE (The Photographer’s Ephemeris) – for moonrise/sunrise directions.
3. Time It Right
The best shooting hours are 90 minutes after sunset to 90 minutes before sunrise. For the Milky Way, late spring to early autumn provides the most visible galactic core.
4. Scout and Prepare
Visit your location in daylight to find compositions.
Bring warm clothes, snacks, and safety gear.
Double-check battery life and memory cards.
8. Shooting Techniques for Astrophotography
Here’s how to execute a clean, crisp night sky shot.
1. Set Up
Mount the camera securely on your tripod.
Turn off image stabilization.
Use a remote shutter or self-timer to minimize shake.
2. Take Test Shots
Start with ISO 3200, f/2.8, and 20–25 seconds. Check exposure and focus, then adjust accordingly.
3. Capture Multiple Exposures
Take several frames of the same scene. You can later stack them using software to reduce noise and increase detail.
4. Experiment with Star Trails
If you want circular trails, point your camera toward the North Star (Polaris) and use a 30-minute or longer exposure, or stack hundreds of shorter ones.
5. Add Light Painting
Use a dim flashlight to gently illuminate foreground elements for balance. Be subtle to avoid overpowering the stars.
9. Post-Processing: Turning Raw Data into Stellar Art
Even the best astrophotography shots need post-processing. RAW images often look dull until you bring out the hidden details.
1. Software Tools
Adobe Lightroom – for color correction and exposure.
Adobe Photoshop – for advanced editing and blending.
DeepSkyStacker or Sequator – for stacking multiple exposures.
2. Basic Workflow
Import RAW files into Lightroom.
Adjust exposure, contrast, and white balance.
Reduce noise while preserving star detail.
Boost clarity and texture to emphasize the Milky Way.
Crop and straighten for composition refinement.
Export as high-quality JPEG or TIFF.
3. Advanced Techniques
Use masking to selectively brighten the Milky Way.
Apply gradient filters to balance sky brightness.
Combine foreground and sky exposures in Photoshop for perfect dynamic range.
4. Color Correction Tips
Avoid over-saturation. Aim for a natural yet vibrant balance—cool tones for the sky, warm tones for the horizon.
10. Common Challenges and How to Overcome Them
Even experienced astrophotographers encounter a range of common challenges when capturing the night sky, but each issue has a practical solution. One frequent problem is blurry stars, often caused by poor focus or slight tripod movement. This can be fixed by switching to manual focus, locking onto a bright star, and ensuring your tripod is completely stable. Another issue is excessive noise, which typically results from using a high ISO setting or very long exposures. To reduce noise, try stacking multiple exposures or applying noise reduction tools during post-processing. Light pollution is another major obstacle, especially in urban or suburban areas where artificial lights wash out the stars. Using a light pollution filter or traveling to a darker location can dramatically improve image quality. Lens fogging can also occur on humid or cold nights when dew settles on your equipment; this can be prevented by using a lens heater or even a simple hand warmer to keep the glass clear. Lastly, underexposure—when your images appear too dark—is usually due to low ISO or too short of a shutter speed. The solution is to slightly increase your ISO or lengthen the exposure time, following the 500 Rule to avoid unwanted star trails. By understanding these common issues and their remedies, you can capture crisp, detailed, and vibrant images of the cosmos with greater consistency.
11. Safety and Etiquette for Night Photography
Shooting at night can be peaceful—but safety and respect are crucial.
Safety Tips
Always tell someone where you’re going.
Carry a first-aid kit and warm clothing.
Beware of wildlife and terrain hazards.
Use red light mode on headlamps to preserve night vision.
Etiquette Tips
Avoid shining bright lights near other photographers.
Respect nature—leave no trace.
Stay quiet and considerate in shared observation areas.
12. The Joy of Continuous Learning
Astrophotography is a lifelong journey. The more you practice, the more your skills—and your appreciation for the cosmos—grow.
Join online forums, attend astronomy club events, or follow astrophotographers on social media for inspiration and mentorship. Each session you shoot will teach you something new—whether about camera settings, timing, or simply patience.
Remember: every great astrophotographer once started by taking blurry photos of the moon. The magic lies in persistence and curiosity.
13. Final Thoughts: Bringing the Universe Closer
Astrophotography isn’t just about technology—it’s about wonder. Each photo you capture freezes a fragment of time millions of years in the making. The light from distant stars you record tonight might have traveled across galaxies to reach your lens.
Through your photos, you become both an artist and an explorer—someone who captures the poetry of the cosmos and shares it with the world. With the right gear, patience, and creativity, you can transform the night sky into timeless art.
So grab your camera, step outside, and look up. The universe is waiting for you to photograph it.
Disclaimer
This article is for informational and educational purposes only. Astrophotography requires adherence to local laws and environmental protection regulations. Always obtain necessary permissions for nighttime photography in restricted areas, and respect natural habitats and observatories. The author assumes no responsibility for personal injury, property damage, or legal issues resulting from the use of this information.