Illuminating the Tiny World: Expert Lighting Techniques for Macro and Close-Up Photography
Discover how to master lighting techniques for macro and close-up photography. Learn how natural and artificial light, diffusers, reflectors, ring lights, and creative shadows can transform your tiny subjects into stunning masterpieces.
LIFESTYLEHOBBYPHOTOGRAPHYHOW-TO
9/24/20258 min read
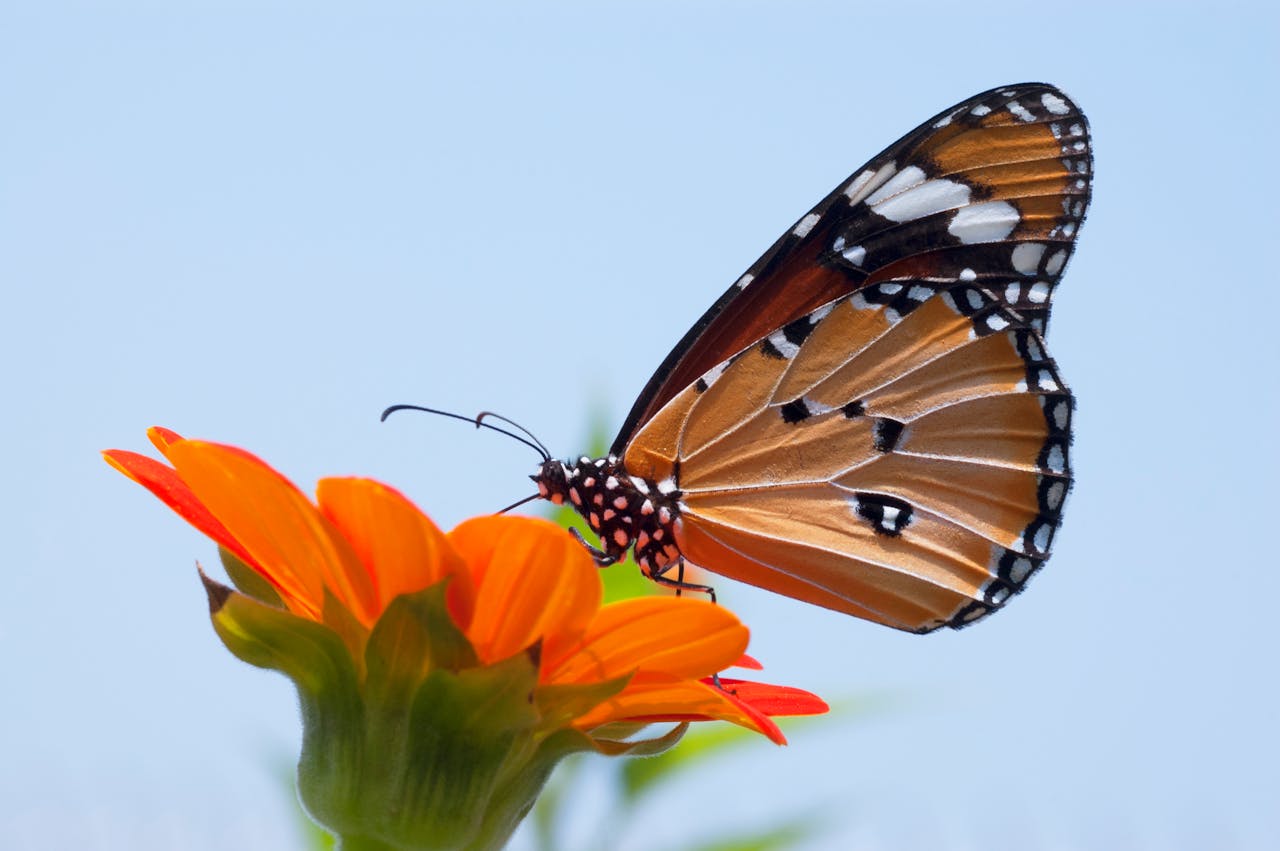
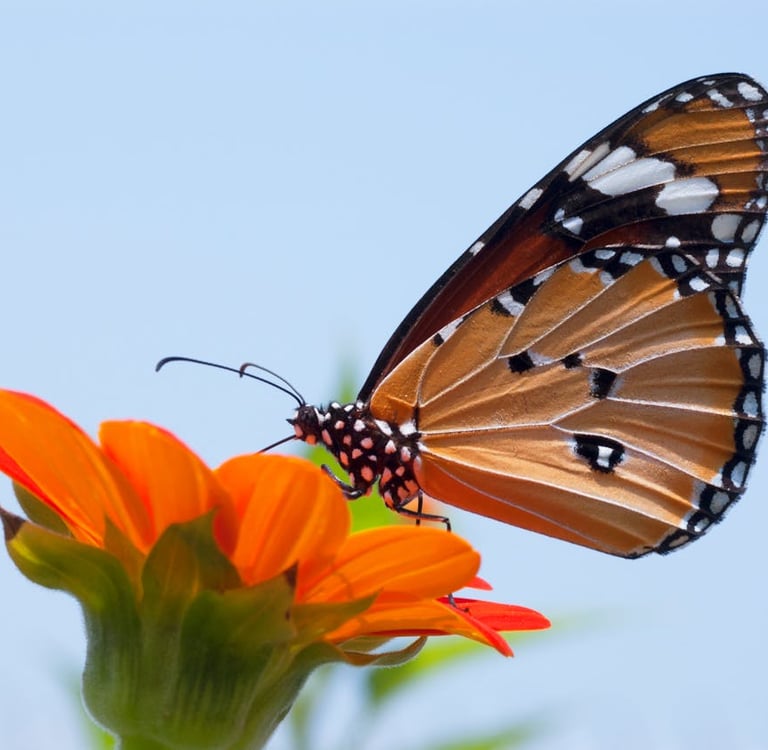
Macro and close-up photography open doors to a fascinating universe that often goes unnoticed—the glistening dew on a spider’s web, the intricate texture of a butterfly’s wing, or the glimmer of light on a gemstone. These images reveal details invisible to the naked eye. However, capturing them beautifully isn’t just about magnification—it’s about mastering light.
Lighting can make or break your macro shots. It determines whether your subject appears sharp, vibrant, and full of depth or flat, dull, and lifeless. Because macro photography deals with subjects at extremely close distances, even the smallest shift in light direction or intensity can dramatically alter your results.
In this guide, we’ll explore the most effective lighting techniques for macro and close-up photography, from natural light and flash systems to creative light modifiers. You’ll learn how to sculpt light around your subject, control reflections, and create dimension, all while keeping your images sharp and appealing.
1. Understanding the Role of Light in Macro Photography
Light is the essence of all photography, but in macro work, it becomes even more critical. When you’re shooting subjects only a few centimeters wide, light behaves differently due to scale and proximity.
At high magnifications, the distance between your lens and subject is small, meaning:
Less ambient light reaches your subject.
Shadows become harsher.
The background often falls into darkness.
Reflections are more prominent on shiny surfaces.
Thus, the challenge in macro photography isn’t just capturing enough light—it’s controlling how light interacts with your miniature world.
Light direction, quality, and intensity directly influence the mood and sharpness of your macro shots:
Front lighting enhances detail and minimizes shadows.
Side lighting reveals texture and shape.
Backlighting adds translucence and glow to thin or transparent subjects, like petals or leaves.
Understanding these light directions helps you shape light like a sculptor, emphasizing what’s important and softening what’s not.
2. Natural Light: Harnessing the Power of the Sun
Natural light remains one of the most versatile and beautiful light sources for macro and close-up photography. It’s free, abundant, and capable of producing stunningly soft tones—if used correctly.
2.1 The Best Time for Natural Light
The golden hours—early morning and late afternoon—offer the most flattering natural light. During these periods:
The sun is low on the horizon.
The light is soft, warm, and directional.
Shadows are gentle, adding depth without harsh contrast.
In contrast, midday sunlight tends to be harsh and can create overexposed highlights and deep shadows, which are especially problematic for small subjects.
2.2 Controlling Natural Light
When shooting outdoors:
Use a diffuser to soften strong sunlight. A simple white translucent fabric or a portable diffuser can reduce glare and prevent blown highlights.
Use a reflector to bounce light into shadowed areas. A small handheld reflector or even a piece of white paper can serve this purpose.
Position your subject relative to the sun. For instance, side lighting emphasizes textures, while backlighting makes translucent objects glow.
2.3 Overcast Conditions
Cloudy days are a macro photographer’s best friend. The sky acts as a giant softbox, scattering sunlight evenly. This natural diffusion minimizes harsh contrast and allows for smooth, detailed exposures—ideal for shooting delicate subjects like flowers or insects.
In essence, natural light for macro photography works best when diffused, balanced, and directed purposefully.
3. Artificial Lighting: Gaining Full Control
While natural light offers beauty, artificial lighting gives consistency and control, especially indoors or during night shoots. Artificial lights allow you to set your preferred direction, color, and intensity.
3.1 LED Panels
LED lights are popular for macro photography due to their:
Adjustable brightness
Constant illumination
Color temperature control
You can see how the light affects your subject in real-time, making adjustments easier. Compact LED panels or even ring-style LEDs can provide sufficient light for handheld macro shots.
3.2 Flash and Speedlights
External flashes offer powerful bursts of light, freezing motion and enhancing detail. When used with diffusers, flashes can mimic soft daylight.
Advantages of flash for macro:
Instant illumination without motion blur.
Customizable power output.
Can be positioned off-camera for creative effects.
Use a TTL (Through The Lens) flash setting for automatic light metering, or go manual for precise control. Many macro photographers prefer off-camera flash setups to sculpt light dynamically.
3.3 Continuous Lights
Continuous lighting, such as compact fluorescent lamps (CFLs) or LED tubes, provides steady illumination, perfect for composing and focusing. However, they often lack the intensity of flash, making them suitable primarily for static subjects.
4. Diffusers and Reflectors: Sculpting the Light
Lighting in macro photography is rarely about raw intensity—it’s about quality and direction. That’s where diffusers and reflectors play a crucial role.
A diffuser softens light by scattering it, reducing harsh shadows and contrast. A reflector bounces light onto shadowed areas, balancing the exposure.
Here’s how they work in practical use:
When shooting under harsh sunlight, place a diffuser between the light source and subject.
To fill in shadows, position a reflector opposite the light source.
Combining both ensures evenly lit, natural-looking results.
In a sentence describing what would normally appear in a table:
A diffuser softens direct light by scattering it evenly; a reflector redirects existing light into darker areas; a white card creates neutral fill light; a silver reflector adds brightness and contrast; and a gold reflector introduces warm tones to balance cool environments.
5. Using Ring Lights and Twin Flashes
Macro photographers often rely on specialized lighting tools like ring lights or twin flash systems for precision and control.
5.1 Ring Lights
Ring lights fit around your lens, providing even, shadow-free illumination—ideal for highly detailed close-ups like jewelry, coins, or medical macro photography.
Benefits:
Eliminates unwanted shadows.
Provides uniform light coverage.
Excellent for reflective or small subjects.
However, ring lights can sometimes produce flat lighting, reducing texture visibility. To counter this, adjust the light intensity or slightly tilt the ring to one side.
5.2 Twin Flash Systems
Twin flash systems mount two separate flash heads around the lens, allowing you to control the ratio and direction of light. For example, you can set one flash at 70% power and the other at 30% to create dimensional shadows and highlights.
This setup combines the softness of ring lights with the depth of directional lighting.
6. Light Modifiers and Creative Tools
Once you’ve mastered basic lighting, you can experiment with creative light modifiers to add mood, drama, or character to your macro shots.
6.1 DIY Diffusers
Everyday materials like tracing paper, white plastic bags, or frosted acrylic sheets can serve as effective diffusers. Customizing diffusers allows you to achieve the exact softness your subject requires.
6.2 Snoots and Grids
Snoots and grids focus light into a tight beam, perfect for isolating small subjects against dark backgrounds. This technique enhances contrast and directs attention to the main point of interest.
6.3 Colored Gels
Adding gels over your light source can introduce warm or cool tones, altering mood or enhancing contrast between subject and background. For instance, a blue gel can complement orange-colored subjects beautifully.
7. Managing Reflections and Highlights
Macro photography often involves shiny or reflective subjects like insects, metal surfaces, or glass objects. These can cause unwanted glare if not handled carefully.
7.1 Controlling Reflections
Use diffused light to reduce hot spots.
Change your shooting angle slightly to shift reflections away from key areas.
Use polarizing filters to cut down glare from reflective surfaces.
7.2 Highlight Control
Sometimes, a little highlight adds sparkle and realism. The goal isn’t to eliminate all reflections but to manage them artistically so they enhance texture and dimension rather than distract the viewer.
8. Balancing Exposure and Depth of Field
Lighting and exposure go hand in hand. In macro photography, you often use smaller apertures (f/8 to f/16) to maintain enough depth of field, which can reduce available light. To compensate:
Increase your ISO (within noise limits).
Use flash or additional LED lights.
Employ longer shutter speeds with a tripod to avoid blur.
Proper exposure ensures your subject remains sharp and well-defined, with highlights and shadows balanced naturally.
9. Backlighting and Translucent Subjects
Backlighting in macro photography can create stunning effects, especially with semi-transparent subjects like petals, leaves, or insect wings. The light shining through reveals inner structures and vibrant color gradients.
To achieve beautiful backlit results:
Place your light source behind the subject.
Use a reflector in front to soften shadows.
Underexpose slightly to preserve color richness.
Experiment with different angles to capture a luminous, ethereal quality.
10. Creative Lighting Styles for Macro Photography
Beyond traditional lighting setups, macro photography invites artistic experimentation.
Here’s how various styles can change the mood:
Low-key lighting creates dramatic, shadow-rich images with strong contrast.
High-key lighting produces bright, minimalistic images emphasizing purity and color.
Rim lighting outlines the subject, emphasizing edges and shape.
Specular highlights add sparkle to metallic or wet textures.
For instance, when photographing water droplets, a small backlight can make each droplet glisten like a gem, while side lighting emphasizes spherical depth.
11. Indoor vs. Outdoor Lighting Approaches
Lighting techniques differ significantly between indoor and outdoor environments.
11.1 Indoor Macro Lighting
You have total control over light intensity and color.
Use artificial lights like flashes, LEDs, and desk lamps.
Experiment with backgrounds—black velvet absorbs light, while white boards reflect it.
11.2 Outdoor Macro Lighting
The challenge is adapting to changing light conditions.
Use portable diffusers and reflectors for flexibility.
Take advantage of natural shadows under leaves or overcast skies for soft, balanced illumination.
In a sentence that replaces a table: Indoors, control and creativity dominate, whereas outdoors, adaptability and natural diffusion lead to more spontaneous, organic images.
12. Combining Light Sources for Perfect Balance
Mixing light sources can add both realism and artistry to macro shots. For instance:
Combine natural sunlight with fill flash for balanced exposure.
Use continuous LED with a small strobe to emphasize specific highlights.
Mix cool and warm lights to introduce visual contrast and depth.
When combining lights, match color temperatures or adjust white balance in-camera to avoid mismatched tones.
13. DIY Lighting Hacks for Macro Photographers
You don’t always need expensive gear. Many professional-quality results can be achieved with budget-friendly, DIY solutions:
Use a white plastic container lid as a diffuser.
Craft a mini softbox using foam boards and tracing paper.
Repurpose a handheld mirror as a reflector.
Employ LED fairy lights for creative background bokeh.
These simple tools can transform the way light behaves around your subject, adding elegance and intrigue without high costs.
14. Post-Processing to Enhance Lighting Effects
Even with excellent lighting, post-processing allows fine-tuning of highlights, shadows, and tones. In Lightroom or Photoshop:
Use Dodge & Burn to sculpt light manually.
Adjust contrast and clarity to emphasize textures.
Reduce highlights and shadows subtly to retain natural realism.
Apply selective sharpening to edges illuminated by light.
Remember: post-processing should enhance, not compensate for poor lighting.
15. Common Lighting Mistakes and How to Fix Them
Every macro photographer makes lighting errors. The key is learning to recognize and fix them.
In a sentence that replaces a table: Flat lighting occurs when there’s no directional light—use side lighting for depth; harsh shadows happen when the light is too strong—add diffusion; overexposed highlights come from direct flash—use lower flash power or bounce light; and uneven illumination often means light is too close—step back or use reflectors to spread it.
Avoiding these mistakes ensures your macro images remain vibrant and balanced.
16. Practical Lighting Setups for Different Macro Subjects
Lighting isn’t one-size-fits-all—it depends on your subject’s texture, reflectivity, and transparency.
Flowers: Use soft diffused light or overcast conditions for smooth color gradients.
Insects: Combine flash with diffusers for controlled exposure and freeze motion.
Jewelry: Use side lighting with a reflector to highlight sparkle without glare.
Textures or fabrics: Apply side lighting to emphasize fine details.
Water droplets: Use backlighting to create glowing translucency.
Each setup demands minor adjustments in light angle and intensity, but understanding your subject helps you achieve consistency.
17. Using Light to Convey Mood and Emotion
Light isn’t just a technical element—it’s emotional. In macro photography, lighting defines atmosphere:
Soft diffused light evokes calmness and purity.
Hard directional light creates drama and contrast.
Backlight adds mystery and depth.
Low-angle light gives a sense of warmth and intimacy.
By consciously choosing your lighting mood, you turn simple close-ups into visual storytelling pieces.
18. Final Tips for Mastering Macro Lighting
Always carry a portable diffuser or reflector outdoors.
Use manual exposure settings for better control.
Keep your ISO low to maintain clarity.
Experiment with light angles—small changes yield big differences.
Observe how light interacts with your subject before shooting.
Macro photography rewards patience and experimentation. The more you practice with light, the better your intuition becomes.
Conclusion
Lighting is the heartbeat of macro and close-up photography. It reveals the unseen, enhances textures, and gives life to minute details that otherwise remain hidden. Whether you’re harnessing the gentle warmth of the golden hour, crafting controlled flashes indoors, or experimenting with DIY diffusers, your ability to sculpt light will define the success of your images.
Every small subject becomes monumental under the right illumination. So grab your camera, explore the world of tiny wonders, and let light lead your creativity.
Disclaimer
This blog post is for educational and informational purposes only. The techniques and recommendations shared are based on professional photography practices. Results may vary depending on equipment, environment, and photographer experience. Always exercise caution when using artificial lights and electronic gear outdoors or in wet conditions.