Mastering Long Exposure: The Art of Creative Shutter Speed Photography
Unlock the secrets of long exposure photography with this complete guide. Learn how to use shutter speed creatively to capture motion, light trails, smooth water, and night scenes like a pro.
HOBBYLIFESTYLEPHOTOGRAPHYHOW-TOFEATURED
4/16/20258 min read

Understanding Long Exposure: How to Use Shutter Speed Creatively
Photography is not just about capturing what the eye can see; it’s about interpreting the world through light, motion, and time. Among the many techniques that empower photographers to do this, long exposure photography stands out as one of the most magical and expressive. From silky waterfalls to dazzling city light trails and dreamy starry skies, long exposure enables you to transform ordinary scenes into ethereal works of art.
In this comprehensive guide, we’ll dive deep into understanding how long exposure works, how to use shutter speed creatively, and the gear, settings, and techniques you’ll need to master this captivating art form.
1. What Is Long Exposure Photography?
At its core, long exposure photography is the art of leaving your camera’s shutter open for an extended period to allow more light and motion to be captured. Unlike a typical snapshot that freezes a moment, long exposure blends motion over time—transforming moving elements into smooth, flowing, or streaked visuals while keeping stationary elements sharp.
In simpler terms:
Long exposure = capturing time in a single frame.
Common examples include:
Waterfalls appearing smooth and silky.
Clouds stretched across the sky in elegant streaks.
Car lights forming beautiful trails on city roads.
Star trails tracing circular paths in the night sky.
Fireworks, lightning, or light painting creating dynamic compositions.
2. The Science Behind Shutter Speed and Motion
Photography revolves around three core exposure settings—aperture, ISO, and shutter speed—known as the exposure triangle. Shutter speed controls how long your camera sensor is exposed to light.
Fast shutter speeds (1/500s, 1/1000s, etc.) freeze motion—perfect for action or wildlife shots.
Slow shutter speeds (1/2s, 1s, 10s, or even minutes) allow motion blur—ideal for long exposure.
When your shutter stays open longer, moving elements (like water or lights) blur and merge, while static subjects (like buildings or mountains) remain sharp. This creates a striking contrast that evokes a sense of time and emotion.
To put it into perspective:
If your shutter speed is 1/1000s, you capture one-thousandth of a second. But if it’s 10 seconds, you’re recording all the movement within those 10 seconds in one image.
3. Why Use Long Exposure?
Long exposure photography isn’t just a technical trick—it’s a creative language. It lets you express ideas that go beyond what’s visible to the human eye.
Here’s why it’s so powerful:
Adds drama and emotion: The contrast between stillness and motion evokes mood and mystery.
Conveys the passage of time: You can depict movement (like clouds drifting) that gives photos a temporal dimension.
Cleans up cluttered scenes: Moving people or vehicles may disappear during long exposures, leaving behind serene landscapes.
Transforms light into art: Night scenes become mesmerizing with light trails, fireworks, or illuminated cityscapes.
Encourages patience and mindfulness: Long exposures require slower, deliberate shooting—connecting the photographer deeply with the moment.
4. Essential Gear for Long Exposure Photography
Long exposure photography requires specific tools to ensure sharpness, control, and precision. Below is what you’ll need and why it matters.
1. Camera with Manual Controls
A DSLR or mirrorless camera that allows manual control over shutter speed, aperture, and ISO is essential. You’ll need to set your shutter open for several seconds or minutes.
2. Sturdy Tripod
Since long exposures require keeping the camera perfectly still, even slight vibrations can ruin your shot. A solid tripod prevents camera shake and ensures crisp stationary elements.
3. Remote Shutter Release or Intervalometer
A remote shutter release (wired or wireless) helps you trigger the shutter without touching the camera, reducing vibration. An intervalometer is useful for exposures over 30 seconds or for time-lapse photography.
4. ND Filters (Neutral Density Filters)
An ND filter acts like sunglasses for your camera lens, reducing light entering the sensor. This allows you to use slower shutter speeds even in bright daylight. ND filters come in varying strengths (e.g., ND4, ND8, ND64, ND1000).
5. Lens Hood
Helps minimize lens flare and ghosting from strong light sources—especially useful in sunrise or sunset scenes.
6. Extra Batteries and Memory Cards
Long exposures drain batteries faster, and if you’re experimenting with multiple shots or stacking images, you’ll need plenty of storage space.
7. Weather Protection
If you’re shooting near waterfalls or the ocean, bring microfiber cloths, lens wipes, and rain covers to protect your gear from moisture and spray.
In one sentence: A camera with manual settings, tripod, ND filter, remote release, lens hood, spare batteries, and weather protection are essential for long exposure success.
5. Understanding Shutter Speed Values
The heart of long exposure lies in how long the shutter remains open. Typical long exposures range from 1 second to several minutes, depending on the effect desired.
Here’s how different shutter speeds affect motion:
1/2s to 1s → Slight blur in moving water or traffic.
2s to 5s → Water becomes silky, people start to vanish.
10s to 30s → Smooth water, light trails, blurred clouds.
1 minute to several minutes → Dreamy, surreal effects; perfect for minimalist seascapes or night skies.
Experimentation is key—each subject and lighting condition demands a different duration.
6. How to Set Up Your Long Exposure Shot
Let’s walk through a practical setup for long exposure photography.
Step 1: Choose the Right Scene
Pick a subject with motion—like flowing water, passing cars, moving clouds, or stars. Stationary elements (rocks, buildings, trees) provide contrast.
Step 2: Mount the Camera on a Tripod
Ensure the tripod is stable and on firm ground. Avoid soft sand or shaky surfaces.
Step 3: Compose Your Shot
Use the rule of thirds to frame your composition. Lock focus manually before starting the exposure.
Step 4: Set the Exposure
Switch to Manual Mode (M):
ISO: Start with the lowest (ISO 100 or 200) to minimize noise.
Aperture: f/8 to f/16 for sharpness and depth of field.
Shutter Speed: Start around 1–5 seconds for daylight or 20–30 seconds for night. Adjust as needed.
Step 5: Add an ND Filter (if daytime)
Attach your ND filter to block light. You may need to recompose and focus before attaching, as dark filters make viewing difficult.
Step 6: Trigger the Shutter
Use your remote or set a 2-second timer to avoid shaking the camera.
Step 7: Review and Adjust
Check the histogram to ensure balanced exposure. Adjust the shutter duration if highlights are blown out or too dark.
7. Daytime Long Exposure Techniques
Contrary to popular belief, long exposure photography isn’t limited to night scenes. You can achieve incredible effects during the day—with the right ND filters.
Creative ideas for daylight long exposures:
Smooth out waterfalls and rivers.
Blur moving clouds over landscapes.
Capture waves gently caressing shorelines.
Remove moving people or cars from crowded cityscapes.
Pro Tip:
Use strong ND filters like ND64 or ND1000 to extend shutter speed even in bright sunlight. For example, with an ND1000, a 1/125s normal exposure can become around 8 seconds.
8. Nighttime Long Exposure Techniques
At night, you can leave your shutter open longer without ND filters. This opens up creative possibilities.
1. Light Trails
Use shutter speeds between 5–30 seconds to capture moving cars as glowing lines.
2. Star Trails
Point your camera toward the night sky with exposures of 15 minutes to several hours. Alternatively, take multiple shorter exposures and stack them in post-processing.
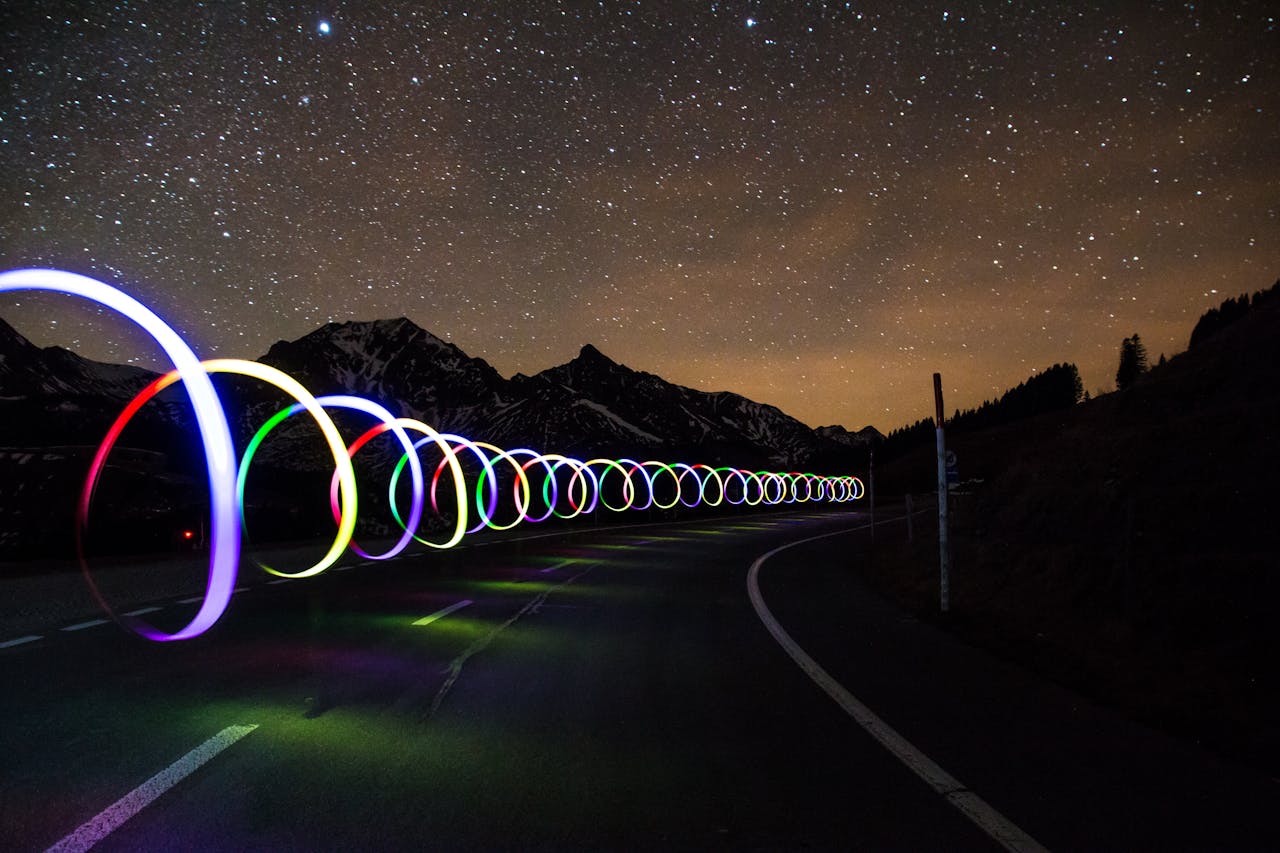
3. Light Painting
Move a flashlight, sparkler, or LED wand during exposure to “paint” light across your frame.
4. Fireworks and Lightning
Set your shutter to Bulb mode and trigger manually to capture the bursts or flashes at just the right time.
9. Using Bulb Mode for Ultra-Long Exposures
Bulb mode lets you manually control how long the shutter stays open—ideal for exposures beyond 30 seconds.
How to use it:
Switch to Bulb (B) mode in manual settings.
Press and hold the shutter button for as long as you want the exposure (or use a remote timer).
Release to end the exposure.
Use this mode for star trails, night cityscapes, or extreme ND filter shots.
10. The Role of ISO and Aperture in Long Exposure
While shutter speed defines the duration of exposure, ISO and aperture balance light and image quality.
ISO: Keep it low (100–200) to avoid noise, especially in long exposures.
Aperture: Use mid-range values (f/8–f/16) for sharpness. Smaller apertures (f/22) can introduce diffraction.
Balance: If too bright, close the aperture or lower ISO instead of shortening the shutter speed, to preserve motion effects.
11. Managing Light with ND Filters
ND filters come in strengths that reduce light by specific stops.
In a sentence: ND2 cuts light by 1 stop, ND4 by 2 stops, ND8 by 3 stops, ND64 by 6 stops, and ND1000 by 10 stops, allowing progressively slower shutter speeds for creative control.
For instance, if your scene requires 1/125s without a filter, an ND1000 can extend it to about 8 seconds—ideal for silky water or drifting clouds.
12. Common Long Exposure Mistakes and Fixes
Every photographer encounters hurdles when learning long exposure. Here’s how to overcome them:
In a sentence: Blurry photos, overexposure, noise, or lens flare usually stem from vibration, incorrect settings, or poor timing.
Problem: Image too bright.
Cause: Shutter too long or ND filter too weak.
Solution: Use stronger ND filters or reduce exposure time.Problem: Photo blurry.
Cause: Tripod instability or wind.
Solution: Use weight hooks, shoot in calm conditions, or shield the camera.Problem: Hot pixels or noise.
Cause: Long exposure heat buildup.
Solution: Enable Long Exposure Noise Reduction in your camera.Problem: Unwanted ghosting.
Cause: Moving objects in frame.
Solution: Recompose or shoot when the scene is less busy.
13. Post-Processing Long Exposure Images
Long exposure images often benefit from thoughtful editing.
Basic adjustments:
White balance: Correct color cast from ND filters or artificial lights.
Contrast and clarity: Enhance separation between moving and static elements.
Noise reduction: Use Lightroom or Photoshop for long-exposure noise cleanup.
Sharpening: Apply subtle sharpening to foreground or static details.
Stacking: Combine multiple exposures for star trails or smooth water blending.
Editing should preserve the natural flow of motion without over-processing.
14. Creative Ideas for Long Exposure Photography
Here are a few themes and inspirations to push your creativity:
Silky Waterfalls: Convey motion and serenity.
Urban Light Trails: Show energy and movement in cities.
Cloud Motion: Add depth to landscapes.
Minimalist Seascapes: Create calm, dreamlike compositions.
Reflections and Shadows: Capture subtle patterns of time and light.
Fire and Sparks: Experiment with steel wool spinning (with caution).
Astrophotography: Explore the cosmos with long star exposures.
15. Mastering Composition in Long Exposure
Composition is the backbone of a compelling long exposure image. Even with perfect settings, poor composition can weaken the result.
Key composition tips:
Anchor your frame: Include a strong static subject (pier, rock, or building).
Balance motion and stillness: Let one element contrast the other.
Use leading lines: Light trails or waves can guide the viewer’s eye.
Mind your horizon: Keep it level unless intentionally stylized.
Experiment with foreground interest: Adds depth and scale.
16. Long Exposure Photography on a Budget
You don’t need expensive gear to start. Even basic equipment can yield impressive results.
Budget-friendly tips:
Use your kit lens—most are sharp enough for long exposures.
Try DIY ND filters using welding glass or sunglasses (though not ideal for quality).
Use a smartphone ND filter app or manual mode on mobile devices.
Stabilize your camera on a table, wall, or bag if you lack a tripod.
With creativity and patience, even a smartphone can produce stunning long-exposure results.
17. Safety and Environmental Awareness
When photographing at night or near water, always prioritize safety.
Avoid standing too close to cliffs or slippery rocks.
Keep equipment dry and secure.
Be mindful of wildlife and local regulations—especially in national parks.
Never endanger yourself for the perfect shot.
18. Practice Makes Perfection
Mastering long exposure is a gradual journey. Every scene, light condition, and subject behaves differently.
Experiment relentlessly—take notes on your settings and results. Over time, you’ll develop intuition for which shutter speeds best capture your creative vision.
Conclusion: Time as a Creative Canvas
Long exposure photography teaches you to see the world differently—not as a frozen instant, but as a continuum of movement and emotion. Whether you’re photographing a bustling city, a quiet waterfall, or the endless stars, you’re not just capturing light—you’re capturing time itself.
Master your shutter speed, balance your exposure, and let your creativity flow. In long exposure, patience rewards you with results that transcend reality—blending the technical and the poetic into pure photographic art.
Final Quick Tips Recap
In a single sentence summary: Use a sturdy tripod, shoot in manual mode, set low ISO, control light with ND filters, compose with balance, and experiment with different shutter speeds to creatively capture motion and time.
Disclaimer
This article is intended for educational and creative purposes only. Always ensure your safety and comply with local regulations when photographing outdoors, especially near water, roads, or restricted areas. The author and publisher are not responsible for any damages, injuries, or losses resulting from misuse of photography equipment or techniques discussed herein.