Mastering Texture Photography: How to Capture Stunning Details from Water Droplets to Fabrics
Discover how to capture breathtaking textures—from delicate water droplets to intricate fabric weaves. Learn expert tips on lighting, camera settings, composition, and post-processing to elevate your texture photography skills.
HOBBYLIFESTYLEPHOTOGRAPHYHOW-TO
5/21/20259 min read
Texture photography is one of the most mesmerizing forms of visual storytelling. It allows you to transform everyday subjects into works of art simply by highlighting their tactile qualities—whether it’s the sheen of a silk scarf, the roughness of aged wood, or the glistening beauty of water droplets on a leaf. Capturing textures is about seeing the world in terms of touch, depth, and dimension. In this comprehensive guide, we’ll explore every element that makes texture photography come alive—from lighting and composition to camera settings and creative editing.
Let’s begin your journey toward mastering the art of capturing textures with precision and creativity.
1. Understanding the Concept of Texture in Photography
Texture in photography refers to how surfaces appear in an image, particularly how they convey a sense of touch and detail. A successful texture photograph allows viewers to almost “feel” the surface through the image. This visual realism stems from how light interacts with the subject, how shadows define details, and how contrast brings out depth.
When you photograph a soft fabric, for example, the smooth flow of the weave can evoke comfort and delicacy. In contrast, photographing cracked paint or rusted metal emphasizes age and resilience. Each texture tells a story—and that story depends on your control over lighting, focus, and composition.
Texture photography can serve various creative purposes:
To emphasize realism in product photography (e.g., fabric, skin, or material surfaces).
To add depth and dimension in fine art and still life images.
To evoke emotions or associations through tactile representation.
Whether you’re shooting water, wood, fabric, or natural elements like leaves and rocks, your goal is to make texture visible through touchless vision.
2. The Science of Seeing: Why Texture Matters in Images
Texture affects how viewers interpret the subject’s realism and visual appeal. Our eyes naturally seek patterns and variations in tone, which help the brain construct an impression of surface quality. Without texture, images appear flat or lifeless. With it, photos gain a sense of authenticity and presence.
Psychologically, texture photography activates what’s known as haptic perception—our brain’s ability to imagine how something feels just by looking at it. This effect is why detailed macro shots of fabrics, sand, or droplets can captivate audiences for long periods.
Texture adds:
Dimension: It creates the illusion of depth through light and shadow.
Contrast: The differences between smooth and rough areas bring visual balance.
Realism: It makes photos relatable and tangible.
Emotion: Soft textures evoke calmness, while coarse ones imply strength or decay.
Understanding these psychological effects helps you choose textures intentionally to evoke the right emotional response.
3. Essential Equipment for Capturing Texture
You don’t need the most expensive camera to capture textures beautifully, but you do need the right tools and techniques. Each piece of equipment plays a critical role in defining detail, contrast, and focus.
Camera
A DSLR or mirrorless camera with manual settings is ideal, as it allows full control over aperture, shutter speed, and ISO. High-resolution sensors capture finer details essential for texture.
Lens
Macro lenses (60mm, 90mm, or 100mm) are perfect for capturing textures like water droplets or fabric fibers. For broader subjects like landscapes or architecture, a standard prime lens (35mm or 50mm) can work beautifully.
Tripod
Textures require precision focus and consistent framing. A tripod eliminates camera shake, especially in low light or macro settings.
Lighting Tools
A ring light, softbox, or even a reflector helps control shadows and highlights—key elements in revealing surface detail.
Accessories
Remote shutter release: Prevents camera movement.
Polarizing filter: Reduces reflections on shiny surfaces.
Spray bottle: Great for creating water droplets or mist.
In sentence form, the essential equipment and their roles can be summarized as follows: A DSLR or mirrorless camera provides manual control, a macro lens captures intricate details, a tripod ensures stability, proper lighting enhances depth, and accessories like filters and sprays help manipulate the texture effect.
4. Lighting Techniques: The Key to Revealing Texture
Lighting is the most crucial factor in texture photography. It defines form, depth, and contrast—the triad that gives textures their realism.
Side Lighting
When light hits your subject from the side, it emphasizes every ridge and depression. This method is perfect for showing rough surfaces like wood grain, fabric folds, or stone walls.
Backlighting
Light from behind creates a halo effect and enhances transparency, ideal for delicate textures like lace or translucent leaves.
Top Lighting
This setup can flatten textures but works well for subtle patterns like smooth fabrics or gentle curves.
Low-Angle Lighting
A light placed close to the surface brings out micro-details, perfect for water droplets or skin-like surfaces.
Natural Light
For organic textures, natural light is unmatched. The golden hours (early morning or late afternoon) offer soft, directional light that beautifully reveals natural textures.
In sentence form, lighting types and their texture effects are: side lighting highlights ridges and roughness; backlighting emphasizes transparency; top lighting softens details; low-angle lighting accentuates micro-texture; and natural light provides authentic, gentle illumination.
5. Camera Settings for Capturing Texture
Your camera settings control how well textures are rendered. These technical choices decide whether the texture appears sharp, smooth, or overly flat.
Aperture (f-stop)
A smaller aperture (e.g., f/8–f/16) increases depth of field, keeping more surface details in focus. For soft backgrounds or selective focus, a wider aperture (f/2.8–f/4) isolates the texture against blur.
Shutter Speed
Use faster shutter speeds (1/125s or faster) to freeze texture in motion—like falling water droplets. For static subjects like fabric or stone, slower speeds with a tripod work fine.
ISO
Keep ISO low (100–400) to avoid noise, which can distort fine textures. High ISO may create artificial grain, altering the texture’s natural look.
Focus
Manual focus ensures precision, especially for macro textures. Autofocus may misjudge depth when shooting fine details.
In one sentence: Use a small aperture for depth, fast shutter speeds for motion textures, low ISO for clarity, and manual focus for pinpoint detail.
6. Composition: Guiding the Viewer’s Touch
Composition determines how a texture is perceived. While textures can fill the frame on their own, thoughtful composition can turn a simple surface into a compelling visual story.
Fill the Frame
Get close to emphasize texture. Filling the frame eliminates distractions and immerses viewers in the tactile experience.
Use Patterns and Repetition
Textures often form natural patterns—like fabric weaves or rippling water. Highlighting these repetitions gives rhythm to the image.
Include Contrast
Pair smooth and rough textures for visual tension. For instance, a soft fabric on rough wood tells a story of contrast and balance.
Play with Angles
Shooting from oblique angles adds dimensionality. A flat-on shot reveals pattern symmetry, while an angled view adds depth.
Leading Lines and Curves
Incorporate lines or folds to guide the viewer’s eye across the texture.
In sentence form: Compositional techniques for texture photography include filling the frame to highlight details, using repetition for rhythm, mixing contrasting textures for visual interest, varying angles for depth, and adding lines or folds to direct the viewer’s gaze.
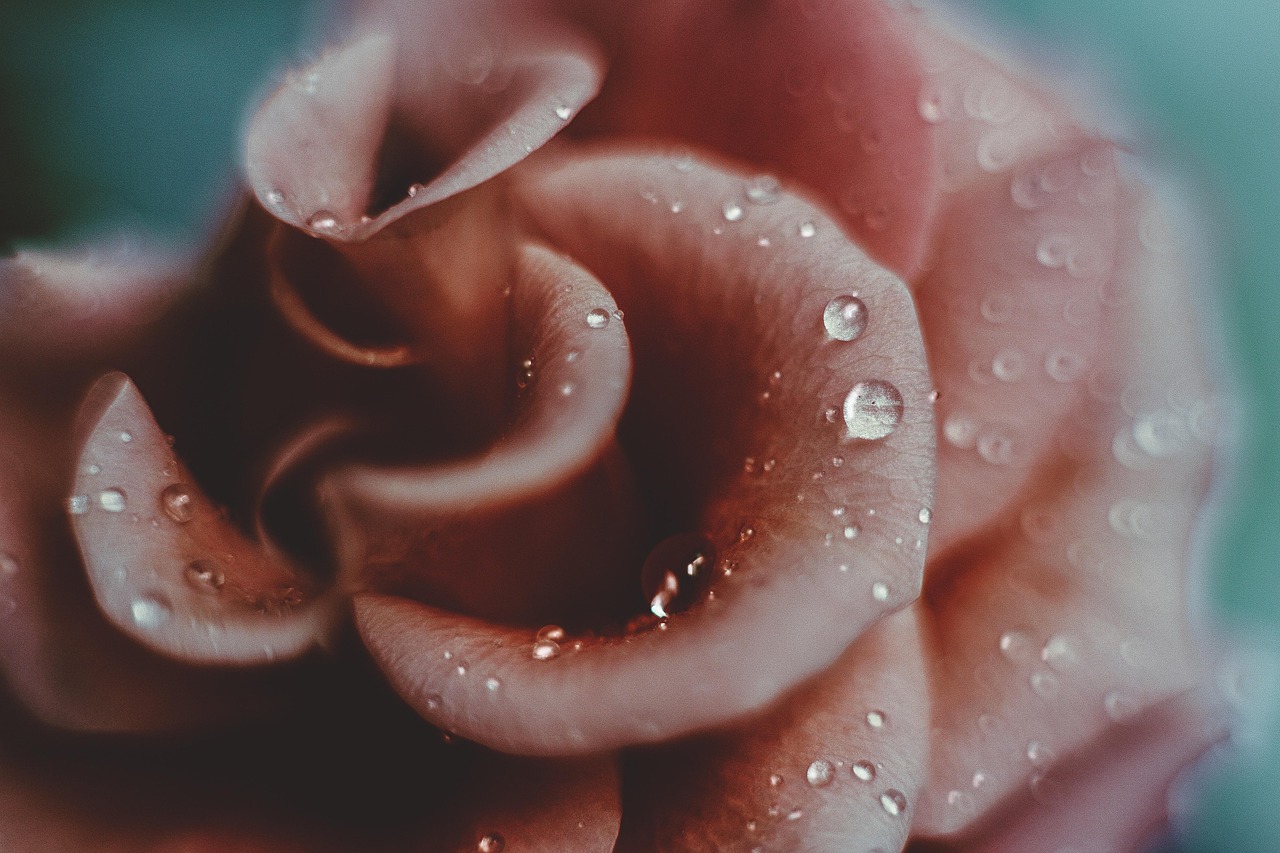
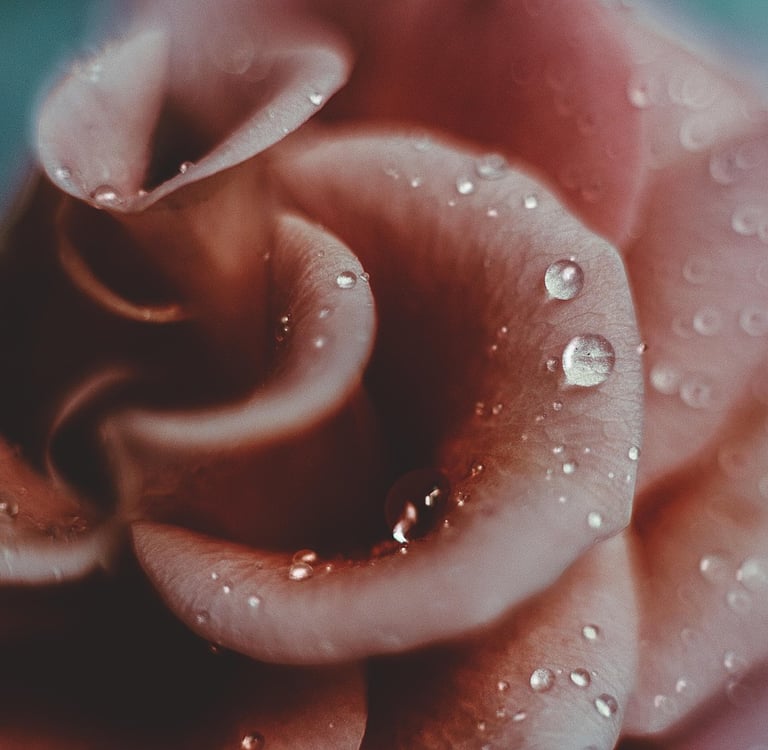
7. Capturing Water Droplets: The Art of Reflective Texture
Water droplets are miniature lenses that refract light and surrounding elements. To photograph them effectively, precision and patience are essential.
Setup
Use a macro lens and tripod. Place your subject near a light source, preferably with a colored or reflective background.
Lighting
Use side lighting or backlighting to emphasize the droplet’s shape and reflective surface. Avoid direct flash, which can cause harsh glare.
Focus and Aperture
Manual focus ensures sharpness on the droplet edges. Use f/8–f/11 to maintain detail across the droplet and surface.
Creative Tips
Spray mist evenly for a natural dew effect.
Capture droplets on flowers, glass, or spider webs for variety.
Try reflections inside droplets by placing colorful objects behind them.
In one sentence: Photographing water droplets involves using a macro setup with side or backlighting, sharp manual focus, and a medium aperture to highlight their reflective and refractive qualities.
8. Photographing Fabric Textures
Fabrics offer endless possibilities—from the shimmer of silk to the rugged weave of denim. Each fabric behaves differently under light, so adaptability is key.
Lighting Fabrics
Soft, diffused light is best for delicate fabrics, while raking light (light from a sharp side angle) emphasizes heavy weaves or folds.
Aperture and Focus
Use f/8–f/16 for detail-rich shots. Focus on folds or seams to show three-dimensional depth.
Color and Contrast
Fabrics often display subtle tonal variations. Adjust white balance carefully to maintain true color representation.
Styling Tip
Arrange folds or wrinkles intentionally. Random creases can look messy; purposeful placement creates visual flow.
In one sentence: Fabric photography works best with diffused or raking light, small apertures for clarity, and deliberate styling to highlight texture flow and contrast.
9. Natural Textures: Wood, Stone, and Leaves
Nature is a texture paradise. Every element—from bark to rock to leaves—offers unique tactile appeal.
Wood Grain
Side lighting brings out lines and knots, especially on weathered surfaces.
Stone and Rock
Use contrast and shadow to emphasize roughness. Moistening stones slightly can enhance their texture and color.
Leaves
Macro shots of leaf veins, water droplets, or decay patterns reveal micro-structures that tell stories of life cycles.
In sentence form: To photograph natural textures, use side lighting for wood grain, high contrast for stone roughness, and macro perspectives for leaf details and droplets.
10. Post-Processing: Enhancing Texture Without Overdoing It
Editing texture photos is about balance—you want to enhance detail, not exaggerate it to artificial extremes.
Sharpening
Apply subtle sharpening to bring out fine detail. Over-sharpening creates halos and noise.
Contrast and Clarity
Increase contrast slightly to make textures pop. Clarity adjustments in Lightroom can enhance midtone definition.
Dodging and Burning
Lighten highlights and darken shadows selectively to create depth.
Color Correction
Adjust white balance to maintain natural tones, especially for fabrics and organic materials.
Black and White Conversion
Removing color can emphasize shape and structure, turning textures into abstract art.
In one sentence: Post-processing texture images involves careful sharpening, controlled contrast, selective dodging and burning, accurate color correction, and optional black-and-white conversion to emphasize form.
11. Experimenting with Depth of Field
Depth of field can dramatically change how textures are perceived. A shallow depth isolates part of a texture, while a deep one brings the entire surface into focus.
Shallow DOF (f/2.8–f/4) isolates highlights or patterns, creating dreamy aesthetics.
Deep DOF (f/11–f/22) emphasizes realism and full surface coverage.
Experiment by adjusting aperture and distance—sometimes a slight blur adds artistic softness, while full focus enhances scientific precision.
In one sentence: Depth of field controls the viewer’s focus on texture—use shallow DOF for artistic emphasis and deep DOF for full tactile realism.
12. Creating Texture Combinations for Storytelling
Textures can complement or contrast to evoke emotion. Combining multiple textures in one frame strengthens visual storytelling.
For example:
Soft fabric on rough stone conveys contrast between comfort and strength.
Water droplets on glass symbolize fragility and purity.
Metal beside wood represents modern versus organic elements.
In one sentence: Combining contrasting textures like fabric and stone or glass and water enriches the narrative power of your photographs.
13. Common Mistakes and How to Avoid Them
Every photographer faces hurdles when shooting textures, but awareness leads to improvement.
In sentence form, common mistakes and solutions are: Flat lighting hides details, so use side light; harsh shadows overemphasize texture, so diffuse light; poor focus softens details, so switch to manual focus; and excessive editing distorts realism, so edit with restraint.
14. Practicing Observation: Training Your Eye for Texture
Great texture photographers have one key skill—observation. They see tactile potential in everyday things others overlook. To train your eye:
Study surfaces around you—walls, fabrics, utensils, nature.
Look at how light changes them throughout the day.
Take test shots and compare lighting angles.
Experiment with zoom and macro to find new perspectives.
In one sentence: Observation practice involves studying how light interacts with surfaces and experimenting through varied perspectives to uncover hidden texture beauty.
15. Inspiring Ideas for Texture Projects
To refine your texture photography, create mini-projects around specific materials.
Project 1: Capture textures of rain—droplets on glass, puddles, reflections.
Project 2: Explore urban decay—rust, peeling paint, cracked walls.
Project 3: Shoot textiles in motion—scarves, curtains, clothing folds.
Project 4: Study nature’s patterns—bark, moss, sand, petals.
Project 5: Experiment with contrasts—soft vs. hard, wet vs. dry.
In one sentence: Creative texture projects like rain, decay, fabric, nature, and contrast studies sharpen your perception and storytelling ability.
16. Using Texture in Commercial and Artistic Photography
Texture is vital in both commercial and fine art photography.
In Product Photography: It highlights material quality, making fabrics, metals, or foods look more appealing.
In Fashion: Texture conveys luxury, comfort, or creativity.
In Art: Abstract texture compositions evoke emotion and mood.
In one sentence: Texture elevates commercial photography by showcasing product quality and enriches artistic work through emotion-driven surface expression.
17. Bringing Texture to Life Through Printing
When printing texture photography, details must remain intact. High-resolution prints and quality paper are essential.
Use matte paper for soft textures like fabric.
Choose glossy or metallic paper for reflective textures like water or metal.
Ensure calibration between screen and printer for accurate tones.
In one sentence: Printing texture photos effectively involves high resolution, paper choice suited to the surface type, and accurate color calibration.
Final Thoughts: Seeing the World Through Touch
Texture photography teaches us to see with our fingertips—to translate the physical world into visual form. Every droplet, wrinkle, or grain carries a silent narrative. Mastering texture means mastering patience, observation, and control of light. The next time you look at your surroundings, notice the play of light on your curtain, the roughness of your coffee mug, or the shimmering rain on your window. Those textures are waiting to tell their story through your lens.
Disclaimer:
This blog post is intended for educational and informational purposes only. The techniques and suggestions discussed are based on general photography practices. Results may vary depending on equipment, lighting, and environmental factors. Always follow safety guidelines when using photography equipment, and respect copyright laws when photographing commercial or public subjects.