Mastering the Silky Water Effect: A Complete Guide to Photographing Moving Water Like a Pro
Discover how to photograph moving water for a smooth, silky effect with this in-depth guide. Learn expert camera settings, composition techniques, filters, and post-processing tips to transform waterfalls, rivers, and ocean waves into stunning works of art.
LIFESTYLEHOBBYPHOTOGRAPHY
8/20/20257 min read
How to Photograph Moving Water for a Silky Effect
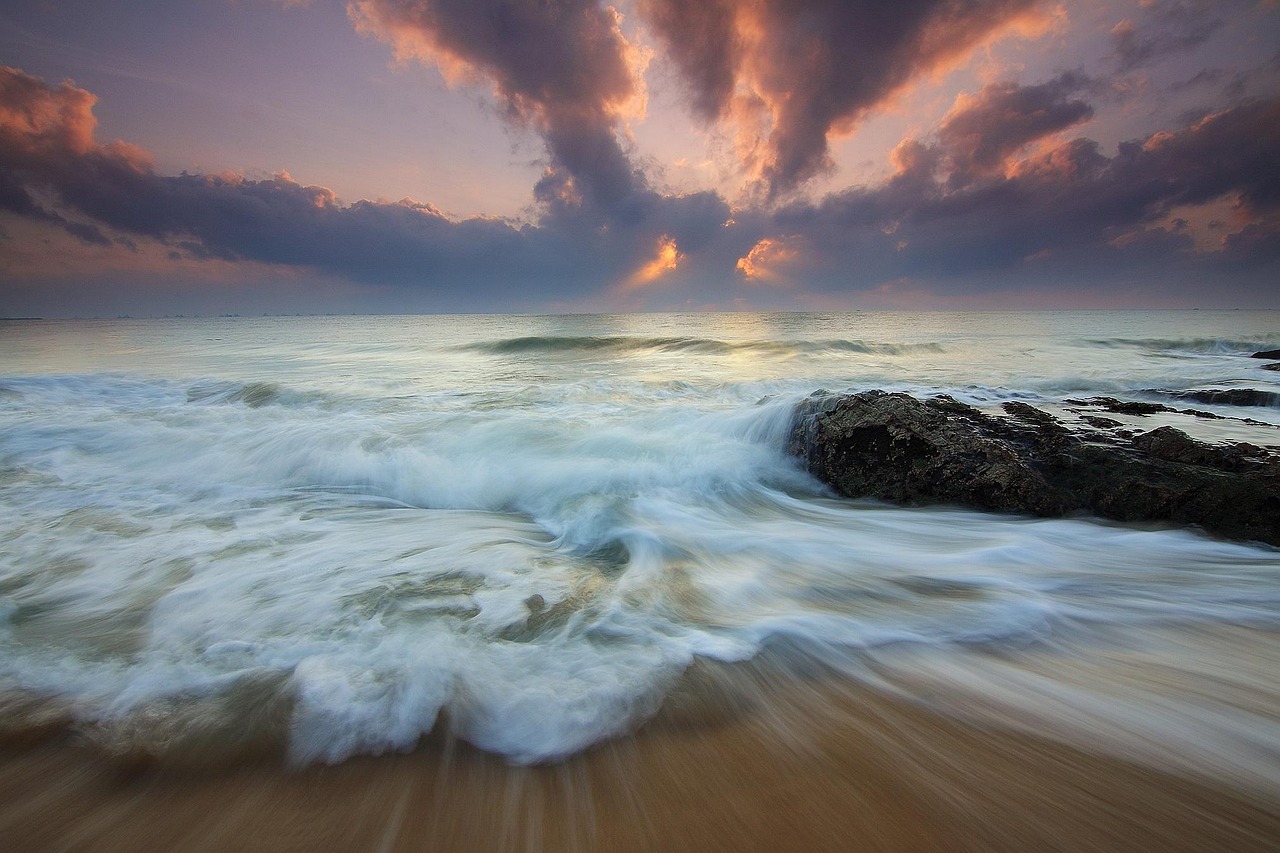
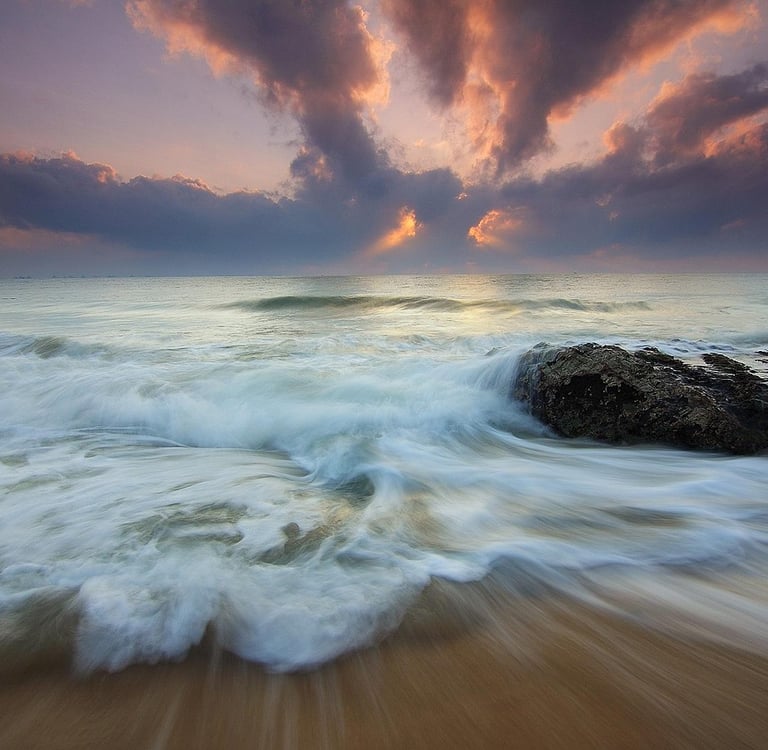
Capturing the movement of water can produce some of the most mesmerizing and tranquil images in photography. Whether it’s a cascading waterfall, a rushing river, or gentle ocean waves, photographing moving water allows you to convey motion and emotion in a single frame. The secret behind that dreamy, silky look you often see in professional landscape photography lies in mastering long exposure techniques.
In this comprehensive guide, you’ll learn how to photograph moving water for a silky effect, from camera setup and filters to exposure control, composition, and editing. Whether you’re shooting with a DSLR, mirrorless, or even a smartphone with manual control, this step-by-step tutorial will help you turn simple water scenes into masterpieces.
1. Understanding the Silky Water Effect
Before diving into the technical side, it’s important to understand what creates the silky water look. When you take a long exposure photograph, the camera’s shutter remains open longer than usual—capturing the movement of the water over time. This results in smooth, flowing streaks of water instead of sharp, frozen droplets.
For example:
A fast shutter speed (1/500s) freezes water mid-motion, perfect for action shots.
A slow shutter speed (1–30 seconds) transforms water into soft, misty flows.
The longer the exposure, the smoother the water appears. However, balance is key—too long, and you might lose all detail in the flow; too short, and the motion might not appear silky enough.
In short:
“Shutter speed controls how time appears in your photo. For silky water, we stretch time just enough to let movement paint itself across the image.”
2. Essential Gear for Photographing Moving Water
While creativity matters most, certain gear will significantly improve your ability to capture that smooth, ethereal water flow.
a. Camera with Manual Controls
You need to manually adjust shutter speed, aperture, and ISO. DSLRs and mirrorless cameras are ideal, but advanced smartphones with “Pro” or “Manual” mode can also work.
b. Sturdy Tripod
Since long exposures require keeping the camera still, a solid tripod is essential to prevent blur from camera shake. Choose one that resists wind and water vibrations.
c. ND (Neutral Density) Filters
These filters act like sunglasses for your lens. They reduce the amount of light entering the camera, allowing longer exposures even in bright daylight.
Common ND filter strengths:
ND4 or ND8: Slight light reduction, good for cloudy days.
ND64 or ND1000: Heavy reduction, perfect for bright sunlight or longer exposures.
d. Remote Shutter Release or Timer
Pressing the shutter button by hand can cause vibration. Use a remote shutter or the 2-second self-timer to eliminate shake.
e. Lens Hood and Microfiber Cloth
Waterfalls and sea spray can fog your lens. A lens hood shields against stray light, while a microfiber cloth keeps your lens clean between shots.
f. Polarizing Filter (Optional)
A circular polarizer helps reduce reflections on water surfaces and enhances colors, especially in bright daylight.
In a sentence instead of a table:
For capturing silky water, the essential equipment includes a manual-control camera, sturdy tripod, ND filters (ranging from ND4 to ND1000), a remote shutter or self-timer, a polarizing filter, a lens hood, and a microfiber cloth for cleaning moisture.
3. Choosing the Right Location and Time
Not all water scenes are equal when it comes to long exposure photography. The right location and lighting conditions make a big difference.
a. Ideal Locations
Waterfalls and Streams: Provide continuous flow and dynamic motion.
Beaches and Oceans: Capture waves rolling in or retreating.
Rivers and Canals: Show the directional flow of water.
Fountains and Urban Water Features: Great for practicing compositions.
b. Best Time of Day
Early Morning or Late Evening (Golden Hours): Soft, warm light enhances mood and texture.
Cloudy or Overcast Days: Ideal because the diffused light prevents harsh shadows and glare.
Blue Hour (After Sunset): Creates dreamy, moody water tones with subtle reflections.
c. Safety Considerations
Always assess footing stability—slippery rocks and rushing water can be hazardous. Keep electronics dry using waterproof covers or plastic wraps.
4. Mastering Camera Settings for the Silky Effect
Camera settings determine how effectively you capture water motion. Each setting interacts with light and time, shaping the final image.
a. Shutter Speed
This is the key. Start with:
1/2 to 2 seconds for gently flowing streams.
5 to 10 seconds for waterfalls or fast rivers.
20 to 30 seconds for ocean waves or tidal pools.
Experiment and review each result—too much blur may erase water texture, while too little might look static.
b. Aperture
A smaller aperture (higher f-number) increases depth of field and reduces light entry. Ideal range: f/8 to f/16.
c. ISO
Keep ISO low (ISO 100 or 200) to minimize noise during long exposures.
d. White Balance
Set to Daylight or Cloudy for natural tones. Avoid Auto White Balance, which can shift colors unpredictably in water scenes.
e. Focus
Use manual focus to lock on a specific rock or water edge before shooting. In dim light, autofocus may struggle.
f. Exposure Compensation
If highlights blow out, reduce exposure by –1 EV or –2 EV to preserve detail in bright water areas.
5. Using ND Filters for Longer Exposures
When light levels are high, even a small aperture might not allow slow shutter speeds without overexposure. This is where Neutral Density filters shine.
They block specific amounts of light, allowing longer shutter times without affecting color balance.
Example:
If your scene is correctly exposed at 1/125s, applying a 10-stop ND filter lets you shoot around 8 seconds—enough to blur water beautifully.
To calculate exposure changes, use ND filter charts or mobile apps like “NDTimer” or “Lee Stopper App.”
6. Composing Your Shot Creatively
Composition transforms technical success into visual storytelling. The silky effect works best when framed within a balanced, engaging scene.
a. Use Leading Lines
Let rivers, streams, or waves guide the viewer’s eyes toward the subject or horizon.
b. Include Static Elements
Rocks, logs, or piers contrast the motion of water—enhancing the silky illusion.
c. Apply the Rule of Thirds
Position waterfalls or flow lines off-center for dynamic balance.
d. Play with Perspective
Try low angles for dramatic water flow or high vantage points for expansive context.
e. Foreground Interest
Add plants, stones, or reflections in front to add depth.
f. Symmetry and Reflection
Still areas in water can mirror surroundings, adding harmony.
7. Managing Exposure in Different Light Conditions
Light changes everything about long exposure water photography.
a. Bright Daylight
Use high-strength ND filters (ND1000 or ND2000).
Narrow aperture to f/16 or higher.
Use ISO 100.
b. Overcast or Dusk
ND8 or ND64 filter is sufficient.
Use wider aperture (f/8–f/11).
Shutter speeds between 2–15 seconds.
c. Night or Twilight
Often, no filter is needed.
Shutter speeds can extend up to 30 seconds or more.
Use manual mode and bulb setting if needed.
8. Practical Shooting Techniques
a. Stability Is Everything
Avoid touching the camera during exposure. Use a remote shutter or timer.
b. Test Before Committing
Take a short exposure test (e.g., 1 second) to ensure correct composition and exposure.
c. Cover the Viewfinder
Light leaks during long exposures can affect exposure; cover it with a built-in shutter or cloth.
d. Check Histograms
Review histograms to ensure no overexposure in highlights. Silky water should retain detail.
e. Bracketing
Capture multiple exposures at different shutter speeds. Later, choose or blend the best results.
9. Common Mistakes and How to Avoid Them
Many photographers struggle with overexposure or muddy water textures. Here’s how to fix them:
In a sentence instead of a table:
If your image has flat highlights, it’s likely from overexposure—reduce shutter speed or add a stronger ND filter. When water looks dull or lacks flow texture, increase exposure slightly to allow more motion blur. If you see camera shake, your tripod may be unstable—add weight or shoot in calmer conditions. Lastly, if composition feels unbalanced, reposition static elements or apply the rule of thirds to anchor your scene.
10. Post-Processing for the Perfect Silky Look
Editing brings out the smoothness and clarity that make silky water images pop.
a. RAW File Advantage
Always shoot in RAW to preserve details for editing.
b. Adjust Exposure and Highlights
Reduce highlights to bring back water texture, and slightly lift shadows to reveal darker rocks or foliage.
c. Boost Contrast and Clarity
Enhances depth but avoid overdoing it; subtlety retains natural appearance.
d. White Balance Fine-Tuning
Cooler tones (slightly blue) often look better for waterfalls and streams, while warmer tones fit sunset seascapes.
e. Sharpen Selectively
Use a masking tool to sharpen only stationary elements, keeping the water smooth.
f. Use Graduated Filters
Darken skies or brighten foregrounds for balance.
g. Remove Distractions
Clone out unwanted objects or lens spots for a cleaner image.
11. Advanced Techniques for Professionals
If you’re ready to take silky water photography to the next level, try these pro tips:
a. Blending Exposures
Take multiple shots—one for water, another for sky or rocks—and blend in Photoshop for perfect balance.
b. Light Painting
During long exposures at night, briefly illuminate rocks or waterfalls with a torch to add depth.
c. Intentional Camera Movement (ICM)
Slightly pan your camera during exposure for artistic, abstract water flow.
d. Focus Stacking
Combine multiple focus points to keep both foreground and background razor-sharp.
e. Long Exposure with Waves
Try combining a static horizon with moving surf for a dynamic seascape blend.
12. Creative Ideas for Different Water Types
Every type of water flow offers a new creative opportunity:
a. Waterfalls
Frame with rocks and greenery. Try 2–5 second exposures.
b. Rivers
Follow the curve of the river to guide the eye. Experiment with 1–10 seconds.
c. Ocean Waves
Capture incoming and receding motion—try 1–3 seconds for foam trails.
d. Rain or Mist
Add ND filters to accentuate rain streaks or fog diffusion.
e. Fountains
Shorter exposures (0.5–2 seconds) balance motion and form.
13. Safety and Environmental Respect
When photographing near water:
Wear non-slip boots.
Avoid standing too close to edges or fast currents.
Don’t disturb wildlife or plants.
Carry a waterproof bag or cover for gear.
Always leave the location cleaner than you found it.
Respecting nature ensures sustainable beauty for future photographers.
14. Building Your Signature Style
As you master the technical steps, start focusing on creative storytelling. Ask yourself:
What emotion do I want this water to convey—calmness or power?
How does light shape the mood?
What composition feels uniquely mine?
Experimenting helps you develop a recognizable photographic identity.
Conclusion: Turning Motion into Art
Photographing moving water for a silky effect is both a science and an art. It’s about understanding exposure and motion, but also about feeling the rhythm of nature. When done well, the result is timeless—a soft, flowing image that captures the poetry of water and light.
Practice regularly, review your work critically, and never stop experimenting. With patience, your silky water photographs will evolve from technical exercises into emotional expressions.
Disclaimer
This article is intended for educational and artistic photography purposes only. Always practice safety near bodies of water and respect environmental conservation laws. Results may vary depending on lighting, equipment, and conditions.