Mastering the Stars: Best Camera Settings for Stunning Night Sky Photography
Discover the ultimate guide to night sky photography. Learn the best camera settings for capturing stars, the Milky Way, and celestial wonders with perfect exposure, sharpness, and color balance.
HOBBYLIFESTYLEPHOTOGRAPHYHOW-TO
5/7/20258 min read
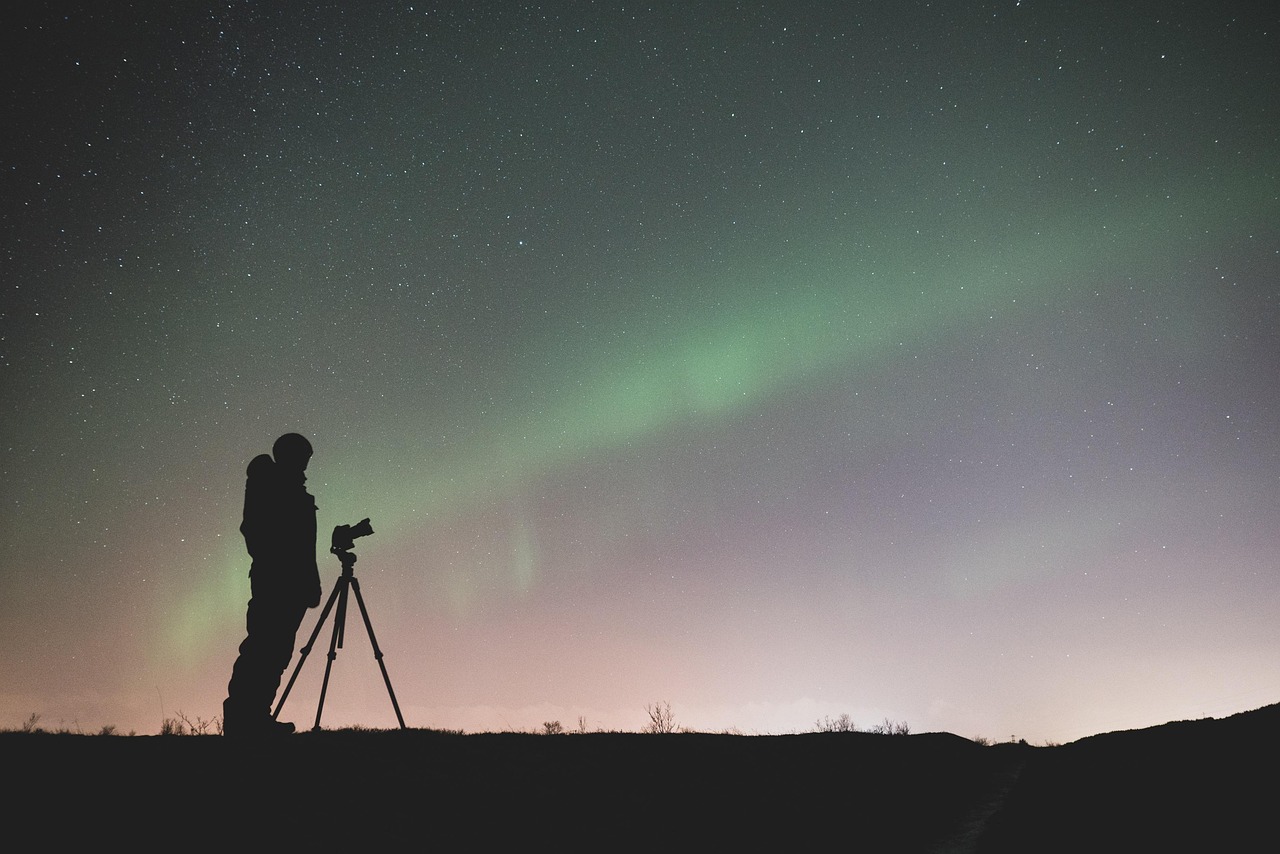
Best Camera Settings for Night Sky Photography
There’s something undeniably magical about photographing the night sky. Standing beneath a blanket of glittering stars, camera in hand, you’re not just taking a picture — you’re capturing the infinite beauty of the cosmos. From twinkling constellations to the radiant Milky Way, night sky photography (also known as astrophotography) is one of the most rewarding and awe-inspiring forms of visual art.
But shooting the night sky requires more than passion; it requires technical precision. The wrong settings can lead to blurry stars, overexposed moons, or dull, noisy images. The right settings, however, can transform darkness into a celestial masterpiece.
This guide dives deep into the best camera settings for night sky photography, covering every detail — from exposure and ISO to lens choice and focusing. Whether you’re a beginner stargazer or a seasoned photographer, you’ll learn how to capture the cosmos with professional clarity and emotion.
1. Understanding Night Sky Photography
Before diving into camera settings, it’s essential to understand what makes night sky photography unique. Unlike daytime shooting, where light floods your scene, nighttime presents a challenge: minimal light and high contrast.
You’ll often be shooting long exposures — meaning your camera’s shutter will stay open longer to gather enough light from faint stars. Your goal is to balance three critical elements:
Exposure time — How long your camera gathers light.
Aperture — How wide your lens opens to let in light.
ISO sensitivity — How responsive your camera sensor is to light.
These three variables form the Exposure Triangle, and mastering their balance is crucial for clear, well-lit night photos.
Unlike other photography genres, astrophotography demands precise adjustments. Too much exposure leads to star trails (unless intentional), and too little exposure results in underexposed skies. Let’s now break down the settings that make the magic happen.
2. Essential Equipment for Night Sky Photography
Before setting your camera, let’s make sure you have the right tools for the job. While creativity is key, having the proper gear ensures your efforts produce professional-quality results.
Camera
A DSLR or mirrorless camera with manual mode and excellent low-light performance is ideal. Full-frame sensors perform better than crop sensors because they handle noise efficiently and capture more detail in dark conditions.
Lens
A wide-angle lens with a large maximum aperture (f/2.8 or wider) is perfect for night sky shots. The wider the aperture, the more light enters, which is vital when shooting in near darkness.
Tripod
A sturdy tripod is non-negotiable. Even slight camera shake during a long exposure can blur your stars. Choose one that’s stable, especially on uneven ground.
Remote Shutter Release or Timer
Using a remote or your camera’s timer minimizes camera movement when pressing the shutter button.
Other Essentials
Extra batteries (the cold drains them fast)
Headlamp with a red light (so you can see without ruining your night vision)
Star-tracking app (like Stellarium or Sky Guide for positioning celestial objects)
With your gear ready, it’s time to set up your camera for the stars.
3. The Core Settings for Night Sky Photography
Let’s look at the heart of this guide — the settings that control how your camera interprets the light of the stars.
Aperture (f-stop)
Set your aperture as wide as your lens allows — ideally between f/1.4 and f/2.8. A wide aperture lets in more light, crucial for bright, detailed night shots.
However, if your lens produces soft corners at its widest setting, stop down slightly (e.g., from f/1.4 to f/2) for improved sharpness without losing much light.
Shutter Speed
The longer the exposure, the more light the camera captures — but too long, and stars turn into streaks due to Earth’s rotation.
To avoid star trails, use the 500 Rule:
Shutter speed (in seconds) = 500 ÷ focal length (in mm)
For example, if you’re using a 20mm lens on a full-frame camera:
500 ÷ 20 = 25 seconds.
So, your exposure time should be around 25 seconds to keep stars sharp.
If you’re using an APS-C or Micro Four Thirds sensor, remember to multiply your focal length by the crop factor before applying the rule.
ISO
ISO controls your camera’s sensitivity to light. For night photography, start with ISO 1600–3200.
Higher ISOs make stars brighter but also increase noise. Modern cameras with advanced sensors handle high ISO better, so experiment within your camera’s comfort zone.
Focus
Auto-focus struggles in the dark, so switch to manual focus.
Here’s how:
Set your lens to manual focus.
Aim at a bright star or distant light.
Use live view, zoom in digitally, and turn the focus ring until the star appears sharp and crisp.
If your camera offers focus peaking, enable it to make this easier.
White Balance
Set your white balance to 4000–5000K for a natural color tone. You can also use the Daylight or Tungsten preset depending on how cool or warm you want your sky to appear.
Since you’re likely shooting in RAW (which you should), you can always adjust this later in post-processing.
4. Location and Timing: Planning Your Shoot
Even the best settings won’t help if your location is flooded with artificial light.
Find Dark Skies
Light pollution is the enemy of night photography. Use websites like Dark Site Finder or Light Pollution Map to locate areas with minimal light interference.
Moon Phase
A full moon can wash out the stars. For Milky Way shots, aim for new moon nights when the sky is darkest. However, for night landscapes, a half moon can illuminate the terrain beautifully.
Weather and Air Clarity
Clear skies with low humidity are best. Clouds obscure stars, and moisture creates haze.
Timing
For Milky Way shots, the best time is typically two hours after sunset until two hours before sunrise, depending on the season and your hemisphere.
A combination of a dark location, the right moon phase, and stable weather conditions forms the foundation of an excellent night shoot.
5. Step-by-Step Camera Setup
Let’s put it all together. Here’s a practical step-by-step setup for your night sky photos:
Mount your camera securely on your tripod.
Set the mode dial to Manual (M).
Choose a wide aperture (f/2.8 or wider).
Set the shutter speed according to the 500 Rule (e.g., 20–25 seconds).
Adjust ISO to around 1600–3200.
Switch to manual focus and fine-tune on a bright star.
Use RAW format for maximum editing flexibility.
Set white balance around 4000–5000K.
Turn off image stabilization (since your camera is on a tripod).
Use a remote shutter or 2-second timer to reduce shake.
Now you’re ready to start capturing the cosmos.
6. Adjusting for Different Night Scenes
Not all night skies are equal. Depending on your subject, you’ll need to tweak your settings slightly. Let’s explore a few examples.
a) Milky Way Photography
Aperture: f/2.8
Shutter speed: 20–25 seconds
ISO: 3200
Focus: Manual, infinity
White balance: 4000K
The goal is to bring out the band of the Milky Way clearly without overexposure. Slightly boost exposure during post-processing to reveal details.
b) Star Trails
Instead of freezing stars, you can let Earth’s rotation create circular trails.
Aperture: f/4
ISO: 400
Shutter speed: Bulb mode (15 minutes or more)
Use a remote trigger with a locking mechanism or intervalometer for continuous long exposures. Stack multiple images in editing software for the best results.
c) Moon Photography
Aperture: f/8 to f/11
ISO: 100–400
Shutter speed: 1/125–1/250 seconds
The moon is bright compared to stars, so reduce exposure to preserve surface details.
d) Aurora Borealis (Northern Lights)
Aperture: f/2
ISO: 800–1600
Shutter speed: 5–15 seconds
Auroras move quickly, so use shorter exposures to capture their dynamic glow.
e) Night Landscapes with Stars
Aperture: f/2.8
ISO: 1600
Shutter speed: 20–25 seconds
Balance exposure between the sky and the land. Consider light painting the foreground with a dim flashlight for extra depth.
7. Common Mistakes and How to Avoid Them
Every night photographer encounters challenges. Awareness helps you overcome them quickly.
Flat or dim stars often result from too small an aperture — open your lens wider or raise ISO slightly. Star trails occur because of too long exposure — apply the 500 Rule to limit movement. Excessive noise means ISO is too high; try a lower ISO with a longer shutter speed. Blurry images happen from camera shake — always use a tripod and remote shutter. Misfocused stars are due to poor manual focusing; zoom in on live view and fine-tune until sharp.
Understanding these small adjustments will help you produce consistently crisp and vibrant shots.
8. Post-Processing: Bringing the Night Sky to Life
Your photo doesn’t end when you click the shutter. Post-processing transforms good shots into breathtaking ones.
Shoot in RAW
RAW files retain the most data, allowing you to adjust exposure, color, and noise later without losing quality.
Software
Use Adobe Lightroom, Photoshop, or Luminar Neo for best results.
Editing Steps
Adjust Exposure — Brighten slightly without washing out stars.
Enhance Contrast — Adds depth and separates the Milky Way from the background.
Fine-tune White Balance — Adjust between 3500–5000K for natural tones.
Noise Reduction — Apply gently to retain star sharpness.
Sharpening — Lightly enhance details to make stars pop.
Local Adjustments — Use brushes or masks to brighten the Milky Way or foreground selectively.
Avoid over-editing; subtlety often produces the most realistic and magical results.
9. Creative Techniques for Night Sky Photography
Once you master the basics, experiment creatively to elevate your work.
Star Trails Composites
Capture hundreds of short exposures (e.g., 30 seconds each) and stack them using software like StarStaX or Photoshop. This produces mesmerizing circular patterns showing Earth’s rotation.
Time-lapse of the Milky Way
Shoot continuous frames over hours. When compiled, you’ll see the galaxy drift across the sky.
Foreground Illumination
Use a low-intensity flashlight or lantern to subtly light rocks, trees, or buildings. This adds depth to your composition.
Panorama
Shoot multiple frames in a grid and stitch them together for a sweeping Milky Way landscape.
Blending Exposures
Combine separate exposures of the sky and land for balanced brightness and detail.
10. Composition Tips for Capturing the Night Sky
Camera settings alone don’t guarantee a stunning image — composition completes the story.
Include a Foreground Element: A mountain, tree, or silhouette anchors your viewer’s eye.
Use the Rule of Thirds: Position the Milky Way or main subject along the top or bottom third of the frame.
Leading Lines: Roads, rivers, or fences can guide the eye into the sky.
Reflections: Water bodies mirror the stars beautifully.
Frame the Scene: Use natural arches, trees, or ruins to frame your celestial subject.
Every shot should tell a story — not just of stars, but of how you experienced them.
11. Advanced Tips for Professionals
For those ready to push boundaries:
Use a Star Tracker: Mounts like the Sky-Watcher Star Adventurer rotate with the Earth, allowing longer exposures without trails.
Stack Images for Noise Reduction: Combine multiple exposures of the same frame to reduce noise and enhance clarity.
Use Histogram for Exposure: Ensure the graph peaks toward the middle, not the edges.
Monitor Temperature: Long exposures heat up sensors, causing noise. Let your camera rest between shots.
Astrophotography is both art and science — patience and precision yield breathtaking results.
12. Troubleshooting Quick Guide
In night sky photography, several problems can arise and can be solved systematically. When your stars look blurry, it’s often due to incorrect focus or camera shake — use manual focus and a tripod. If your photos are too noisy, your ISO is likely too high — try reducing it or stacking multiple exposures. When your stars trail, your shutter speed is too long — apply the 500 Rule. If your image looks too dark, increase exposure time or ISO slightly. When colors appear unnatural, adjust your white balance toward 4000–5000K. If condensation forms on your lens, use lens warmers or periodically wipe gently with a dry cloth.
These small tweaks ensure consistently sharp and vibrant celestial shots.
13. The Joy and Patience of Night Photography
Night sky photography rewards patience. You’ll spend hours under the stars, adjusting, waiting, and experimenting. But the result — seeing the Milky Way or a meteor shower in your frame — is worth every minute.
It’s also a humbling experience. You realize how small we are in the grand tapestry of the universe, and how your camera becomes a bridge between human curiosity and cosmic wonder.
Conclusion: Turning Darkness into Art
Mastering night sky photography isn’t just about learning camera settings — it’s about learning to see in the dark. Every small adjustment in aperture, ISO, and shutter speed is a creative decision that shapes how you tell your celestial story.
Whether you’re capturing a single bright star, the swirling Milky Way, or the soft glow of the Northern Lights, remember that the key lies in balance: between light and dark, patience and passion, science and art.
So grab your tripod, step into the night, and let your lens reveal the universe. The stars are waiting.
Disclaimer:
This article is for educational and creative guidance only. Settings and results may vary based on camera models, environmental conditions, and location. Always respect private land, local regulations, and natural habitats while photographing. Brilliant Perspective is not responsible for any damages, losses, or injuries resulting from the application of techniques described herein.