Mastering Time-Lapse Photography: A Complete Guide to Capturing the Passage of Time
PHOTOGRAPHYHOW-TONATURETRAVEL
2/9/20253 min read
Introduction
Time-lapse photography is a fascinating technique that allows photographers to capture slow-moving changes and present them in an accelerated format. From bustling cityscapes to serene sunsets and blooming flowers, time-lapse photography transforms ordinary scenes into dynamic visual experiences.
In this comprehensive guide, you will learn the fundamentals of time-lapse photography, the best equipment to use, step-by-step instructions on how to shoot, and expert tips to refine your skills. Whether you're a beginner or a seasoned photographer, this guide will help you create stunning time-lapse videos that captivate audiences.
Understanding Time-Lapse Photography
Time-lapse photography involves capturing a series of images at set intervals and then compiling them into a video sequence. When played at a standard video frame rate, these images create the illusion of time speeding up.
Common Uses of Time-Lapse Photography
Nature and Landscapes: Clouds moving, sunrises, sunsets, tides, and seasonal changes.
Cityscapes: Traffic movement, pedestrian flow, and urban development.
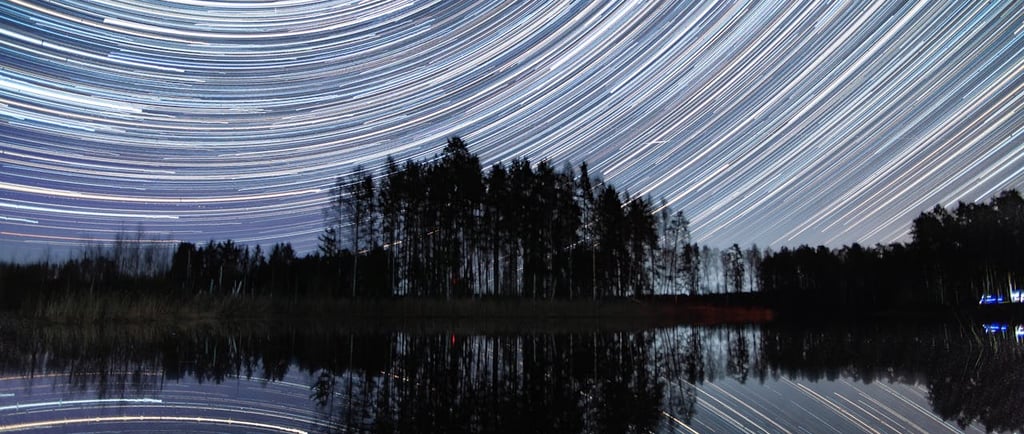
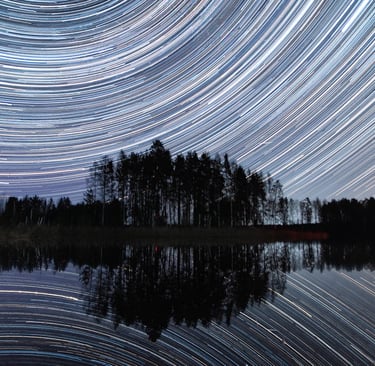
Astrophotography: Star trails and celestial movements.
Construction Projects: Documenting the progress of a building over months or years.
Art and Creativity: Painting, sculpting, and other artistic processes.
Essential Equipment for Time-Lapse Photography
1. Camera
Any camera with manual settings and an intervalometer (or compatibility with an external intervalometer) can be used. Recommended options:
DSLR Cameras (Canon, Nikon, Sony, etc.)
Mirrorless Cameras
GoPro and Action Cameras
Smartphones with Time-Lapse Apps
2. Tripod
A sturdy tripod is essential for keeping your shots stable and consistent.
3. Intervalometer
An intervalometer automates the process of taking photos at fixed intervals. Some cameras have built-in intervalometer functions.
4. ND Filters
Neutral Density (ND) filters help control light exposure, allowing smoother motion effects in bright conditions.
5. Extra Batteries and Memory Cards
Long time-lapse shoots drain battery power quickly and require ample storage for thousands of images.
Step-by-Step Guide to Capturing Time-Lapse Photography
Step 1: Planning Your Time-Lapse Shoot
Choose a subject with visible movement.
Decide the duration and playback speed.
Calculate the interval time using the formula:
Interval = Total Recording Time / Number of Frames Needed
Step 2: Setting Up Your Camera
Shoot in Manual Mode: Adjust ISO, shutter speed, and aperture manually.
Focus: Use manual focus to prevent focus shifts between shots.
White Balance: Set to a fixed value to avoid color changes.
RAW vs. JPEG: RAW provides better post-processing flexibility.
Step 3: Choosing the Right Interval
Fast-moving subjects: 1-3 seconds (e.g., traffic, people walking).
Slow-moving subjects: 10-30 seconds (e.g., clouds, sunset, plants growing).
Long-term projects: 1 minute to hours (e.g., construction, seasonal changes).
Step 4: Capturing the Time-Lapse
Use a remote shutter or intervalometer to automate shots.
Keep the camera steady on a tripod.
Monitor battery life and storage capacity.
Step 5: Editing and Compiling Your Time-Lapse Video
Use software like Adobe Premiere Pro, LRTimelapse, or DaVinci Resolve.
Adjust brightness, contrast, and colors.
Stabilize shaky footage if necessary.
Export the video in high resolution (1080p or 4K).
Pro Tips for Creating Stunning Time-Lapse Videos
1. Experiment with Motion
Adding camera movement using a motorized slider or pan head can enhance the dynamism of your time-lapse.
2. Use the Holy Grail Technique for Day-to-Night Transitions
Gradually adjust exposure settings to create seamless transitions from daylight to nighttime.
3. Avoid Flickering
Use deflicker tools in post-production to smooth out inconsistent brightness changes.
4. Incorporate Hyperlapse Techniques
Move the camera slightly between shots to create a cinematic traveling effect.
5. Tell a Story
Time-lapse photography should have a clear beginning, middle, and end. Plan your shots accordingly.
Common Mistakes to Avoid
Inconsistent Intervals: Keep intervals consistent to avoid erratic motion effects.
Poor Exposure Settings: Overexposure or underexposure can ruin the footage.
Camera Shake: Use a sturdy tripod and avoid touching the camera during shooting.
Insufficient Frames: Ensure you capture enough frames to create smooth motion.
Forgetting to Check Weather Conditions: Wind, rain, or sudden lighting changes can impact your results.
Conclusion
Time-lapse photography is a powerful technique that transforms ordinary moments into breathtaking visual stories. By following the steps outlined in this guide, practicing consistently, and experimenting with different settings, you can master the art of capturing time in motion. Whether you’re documenting nature, cityscapes, or creative projects, time-lapse photography allows you to showcase the beauty of change in a way that’s truly mesmerizing.