The Beauty of City Lights: Mastering Slow Shutter Photography at Night for Stunning Urban Shots
Discover how to capture the mesmerizing glow of city lights using slow shutter photography. Learn expert tips, settings, and techniques to transform your night shots into dazzling works of art.
LIFESTYLEHOBBYPHOTOGRAPHYHOW-TO
10/1/20257 min read
The Beauty of City Lights: Slow Shutter Photography at Night
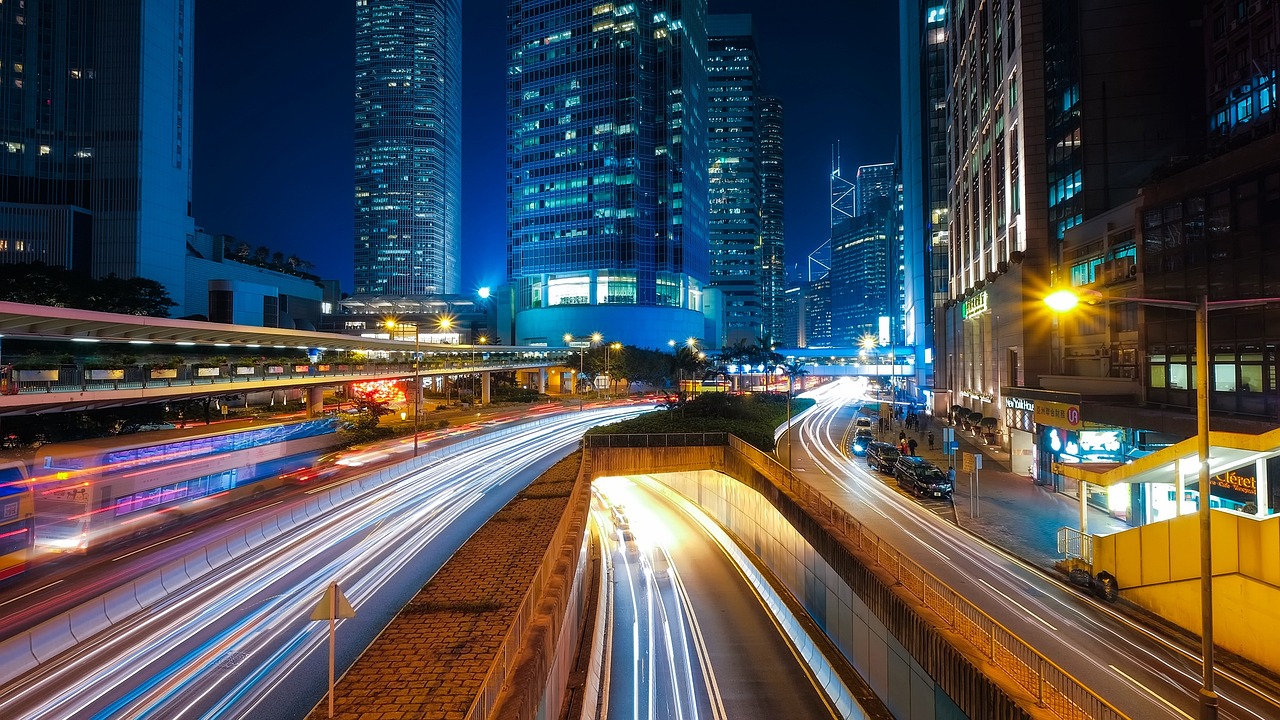
Cities never sleep. As the sun sets and neon signs flicker on, the urban landscape transforms into a glowing masterpiece of color, motion, and reflection. For photographers, this transformation offers an extraordinary opportunity—an invitation to explore the art of slow shutter photography. With the right camera settings, timing, and creativity, the dance of car lights, illuminated skyscrapers, and reflective puddles can be turned into visual poetry.
This comprehensive guide will walk you through every aspect of slow shutter city photography—from technical mastery to artistic vision. Whether you’re a beginner learning to use manual mode or a seasoned photographer seeking to elevate your night shots, you’ll discover practical steps, creative insights, and inspiring methods to make every frame stand out.
1. Understanding Slow Shutter Photography
Slow shutter photography is the art of capturing motion through extended exposure times. Instead of freezing a moment, it records movement—turning passing cars into luminous trails, crowds into ghostly blurs, and water reflections into dreamy smears of light.
In essence, it’s about controlling time. When you slow your shutter speed, your camera sensor remains open longer, collecting more light and motion. In dark city environments, this technique allows you to capture vibrant night scenes without losing detail or atmosphere.
The Science Behind It
Every photograph is shaped by three elements: shutter speed, aperture, and ISO—the exposure triangle.
Shutter Speed controls how long your camera’s sensor is exposed to light.
Aperture determines how much light enters through the lens.
ISO affects how sensitive your sensor is to light.
In slow shutter photography, you typically use a shutter speed between 1 second and 30 seconds, sometimes even longer. A longer exposure means more light and more movement captured in one frame.
Why City Lights Are Ideal Subjects
City lights create contrast, color, and rhythm. Street lamps, car headlights, glowing billboards, and window reflections combine to form an urban symphony of luminance. These elements make slow shutter shots visually dynamic because:
They produce vivid streaks of motion.
They highlight contrasts between light and shadow.
They reveal hidden patterns and symmetry that aren’t visible to the naked eye.
Nighttime transforms cities into playgrounds for creativity—offering limitless opportunities to experiment with light trails, reflections, and motion blur.
2. Essential Equipment for Night Slow Shutter Photography
You don’t need the most expensive gear to create breathtaking night photos—but having the right tools can dramatically improve your results.
Camera
A DSLR or mirrorless camera with full manual control is ideal. You’ll need to adjust shutter speed, aperture, and ISO manually. Most modern cameras handle low-light situations well, especially those with larger sensors (full-frame or APS-C).
Lens
A wide-angle lens (16–35mm range) captures sweeping cityscapes, while a prime lens with a large aperture (f/1.8 or f/2.8) excels in dim lighting. Choose based on your desired composition—wide for landscapes, telephoto for isolating light trails.
Tripod
A sturdy tripod is non-negotiable. Even the slightest camera shake during a long exposure can ruin a shot. Go for one with stable legs and a secure head.
Remote Shutter Release
This accessory allows you to trigger your camera without touching it, minimizing vibrations. A wireless or cable release both work well.
ND (Neutral Density) Filters
ND filters reduce the amount of light entering your camera, letting you use longer exposures even under bright artificial lighting—such as neon signs or car headlights.
Spare Batteries and Memory Cards
Long exposures consume more power, and you’ll take multiple test shots. Always carry extras to avoid missing perfect moments.
Lens Cloth and Rain Cover
City nights can bring fog, mist, or drizzle. Keep your lens clean and protected for crisp, clear images.
In short: For the best results, use a manual camera, wide lens, tripod, remote shutter, and ND filters, supported by spare batteries and protective gear.
3. Best Camera Settings for Capturing City Lights
The magic of slow shutter city photography lies in fine-tuning your settings. Here’s how to get started.
Shutter Speed
Begin with 2–5 seconds for moderate light trails (cars, trams, or people). For dramatic effects, extend to 10–30 seconds. Experiment based on movement speed—faster objects need shorter exposure; slower ones need longer.
Aperture
Set between f/8 and f/16 for deep focus and starburst effects around lights. Smaller apertures create sharpness throughout the frame while maintaining a balanced exposure.
ISO
Keep it low (ISO 100–400) to avoid digital noise, which is more visible in dark conditions. Use your camera’s noise reduction if necessary.
Focus
Switch to manual focus. Autofocus struggles in low light. Use your camera’s live view and magnify the image to manually focus on a bright light source or distant object.
White Balance
Set your white balance manually or use presets like Tungsten for cooler tones or Daylight for warmer hues. You can always refine colors in post-processing.
Shoot in RAW
RAW files retain more data than JPEGs, giving you flexibility to adjust exposure, contrast, and color temperature during editing.
4. Choosing the Perfect Location
Your location determines the character and composition of your shot. Urban environments are filled with visual drama—choose places where light and motion intersect beautifully.
Ideal City Photography Spots
Busy intersections – Capture moving cars, buses, and trams creating colorful trails.
Bridges and overpasses – Offer elevated views of city traffic and skyline reflections.
Waterfronts and rivers – Perfect for mirror-like reflections of neon lights.
High-rise rooftops – Provide panoramic views of the city glow.
Public squares and shopping streets – Packed with light sources and human activity.
Before shooting, scout your location during daylight to understand framing, traffic flow, and safety considerations.
5. Composition Techniques for Urban Night Photography
Composition can transform a good shot into an unforgettable one. City scenes are chaotic—use structure and perspective to create balance and focus.
Leading Lines
Use roads, railways, or bridges as leading lines to draw the viewer’s eye into the frame.
Symmetry and Reflection
Look for reflections in puddles, glass, or water bodies to double the light and add visual depth.
Rule of Thirds
Place key elements (like skyscrapers or light trails) along the grid intersections for a harmonious layout.
Foreground Interest
Include objects like lampposts, vehicles, or people to give scale and depth.
Motion Direction
If vehicles or people are moving, compose so their trails lead into or across the frame—creating dynamic flow.
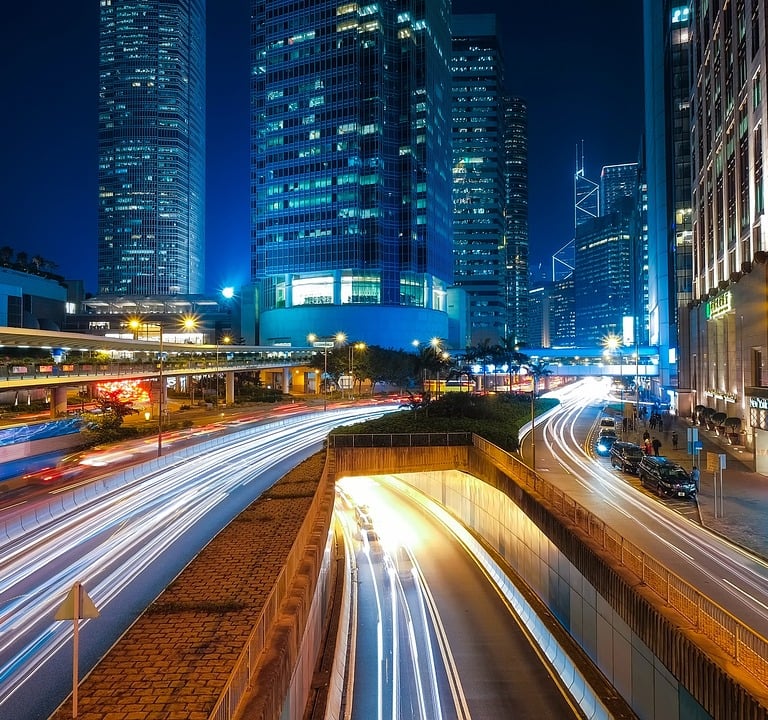
6. Shooting Techniques for Capturing Light Trails
Light trails are the hallmark of city night photography. They symbolize urban energy and time in motion.
Timing is Key
Shoot during blue hour—just after sunset or before sunrise—when the sky retains color but artificial lights are bright. This adds richness to your frame.
Plan for Movement
Wait for vehicles or pedestrians to enter the frame. Observe traffic flow to anticipate patterns.
Bulb Mode for Long Exposures
Use Bulb mode if you want exposures longer than 30 seconds. Hold the shutter open manually or with a remote.
Creative Angles
Try overhead bridges or low street-level views for different perspectives. Long exposures from high vantage points can reveal intricate city designs invisible to the naked eye.
7. Managing Reflections, Glare, and Noise
Artificial lighting can cause unwanted glare or reflections, especially from wet roads, glass, and metal surfaces.
Using a Lens Hood
It helps reduce flare caused by stray light entering from the sides.
Polarizing Filters
Although less effective at night, a polarizer can minimize reflections from glass or water when combined with careful angles.
Reduce Noise
Use long exposure noise reduction (LENR) if available. In post-processing, software like Adobe Lightroom or DxO PureRAW can clean up digital grain.
Avoid Overexposure
Check your histogram regularly. If highlights are clipping, reduce exposure or close the aperture slightly.
8. Creative Variations of City Light Photography
Slow shutter photography offers limitless creativity. Beyond traditional light trails, you can experiment with alternative styles:
Light Painting
Use a small LED or flashlight to draw shapes or illuminate specific areas within the frame during exposure.
Zoom Burst Effect
While exposing, slightly zoom in or out. This creates radial light streaks that seem to explode from the center.
Intentional Camera Movement (ICM)
Move your camera slightly during exposure to create abstract, painterly effects of the city lights.
Double Exposure
Blend two exposures—one for city lights and another for subjects or reflections—to create artistic composites.
9. Post-Processing Tips for Stunning Night Photos
Editing enhances your image without losing authenticity. Follow these steps for professional results:
Adjust Exposure and Contrast
Increase exposure slightly if underexposed, but protect highlights. Boost contrast to emphasize light trails.
White Balance Correction
Fine-tune color temperature to balance warm yellows and cool blues.
Reduce Noise
Apply moderate noise reduction, focusing on shadows and sky. Avoid over-smoothing details.
Sharpen Details
Selective sharpening brings clarity to edges and structures.
Enhance Saturation and Vibrance
Increase vibrance to make colors pop subtly—too much saturation can make it look artificial.
Crop and Straighten
Align horizons, balance framing, and remove distractions to refine composition.
10. Storytelling Through City Lights
Photography isn’t only about technical mastery—it’s about emotion and narrative. Slow shutter night photography can tell powerful urban stories.
Ask yourself:
What do these lights say about the city?
Are you showing chaos, tranquility, loneliness, or vitality?
Does your image invite curiosity or nostalgia?
Use human elements, motion, and perspective to communicate meaning. A blurred pedestrian crossing a neon-lit street can speak volumes about modern isolation or perpetual motion in urban life.
11. Common Mistakes to Avoid
Even skilled photographers make errors when experimenting with slow shutter speeds. Avoid these pitfalls:
Camera shake: Always use a tripod and remote shutter.
Wrong exposure: Don’t rely on auto mode; manually balance settings.
Blown highlights: City lights can overexpose quickly—use histograms to monitor.
Ignoring composition: Light trails alone don’t make a strong photo—structure matters.
Shooting too late: Capture during twilight, not complete darkness, for richer contrast.
12. Case Study: Turning a Busy Street into Light Art
Imagine standing on London’s Westminster Bridge at twilight. Cars rush by, buses glow red, and Big Ben looms under the fading sky.
You set your camera to:
Shutter Speed: 10 seconds
Aperture: f/11
ISO: 200
As you press the shutter, time unfolds. Red and white trails streak past, painting the road with luminous ribbons. The river reflects the lights like molten metal. When you review the shot, the city’s heartbeat has been captured—motion and light harmonized into stillness.
This is the magic of slow shutter photography—it reveals beauty hidden in chaos.
13. Safety and Etiquette While Shooting at Night
Night photography often takes you into dimly lit or isolated locations. Stay safe and respectful.
Scout locations in daylight first.
Avoid blocking sidewalks or roads.
Keep valuables discreet—use a compact gear bag.
Be mindful of private property and security regulations.
Travel with a friend in unfamiliar areas.
Safety enables creativity—always prioritize it.
14. Expanding Your Creative Horizons
Once you master city lights, expand your creative range:
Capture light reflections during rain.
Blend static architecture with moving traffic.
Use fog or mist to diffuse lights for dreamy effects.
Experiment with different times of night—each hour changes the lighting mood.
Every session deepens your understanding of how light interacts with motion and environment.
Final Thoughts: Finding Poetry in the Urban Glow
Slow shutter photography transforms the city into a living canvas of color, energy, and emotion. Through the lens, headlights become brushstrokes, neon signs hum melodies, and skyscraper windows sparkle like constellations.
It teaches patience and vision. Each frame is a meditation on time—a balance between stillness and motion. Whether you’re capturing Tokyo’s neon avenues, London’s rain-slick streets, or New York’s skyline after dusk, the essence remains the same: the beauty of city lights lies in how they reveal life’s pulse long after the day ends.
Disclaimer
This article is intended for educational and inspirational purposes only. Techniques and tips mentioned are based on general photography principles and may vary depending on camera models and environmental conditions. Always ensure safety, adhere to local laws, and respect privacy when photographing in public spaces.